
|
| Pearson 10M Bottom Job |
I will fill this page out with more details and photos of the process but for now here are a few photos of the Bottom Job.
DHP - June 2008
|
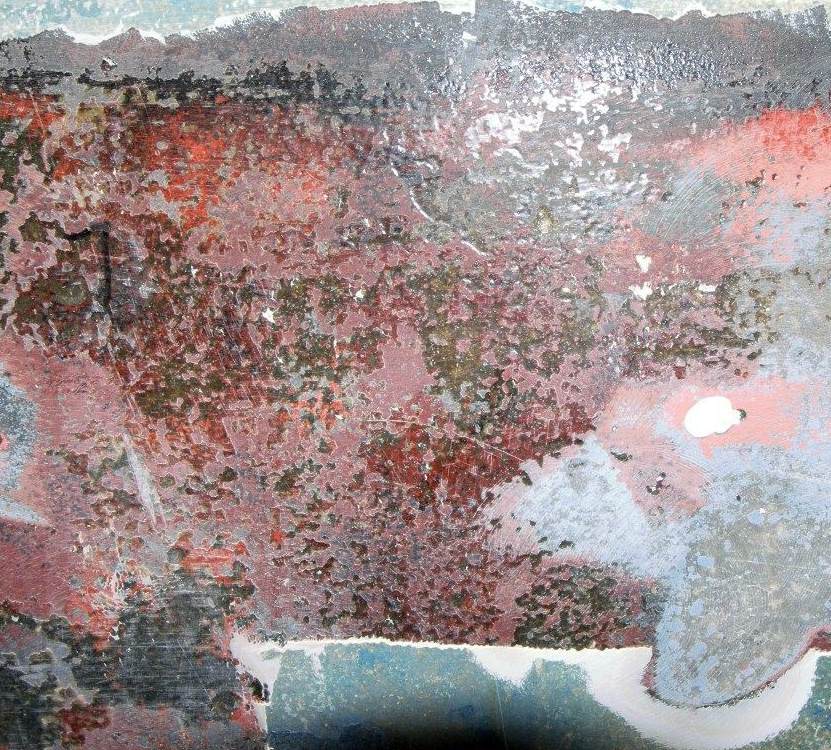
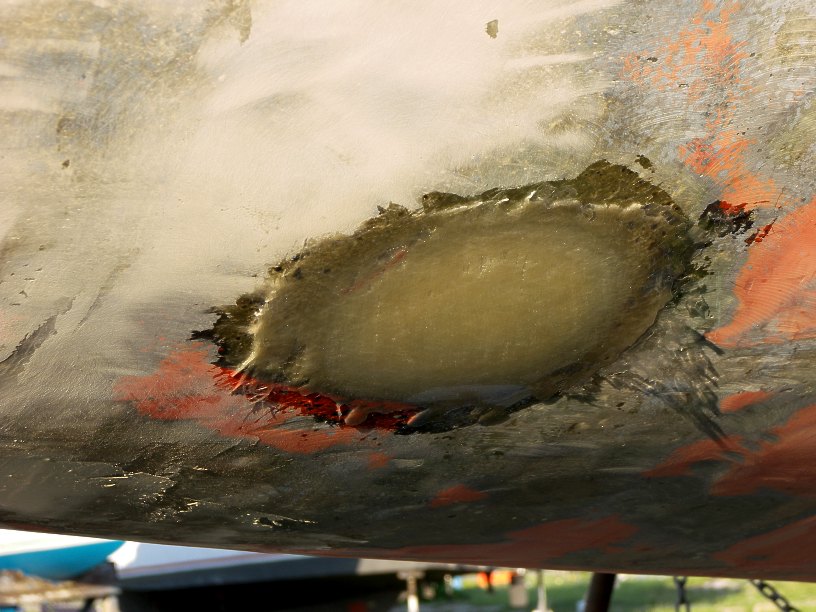
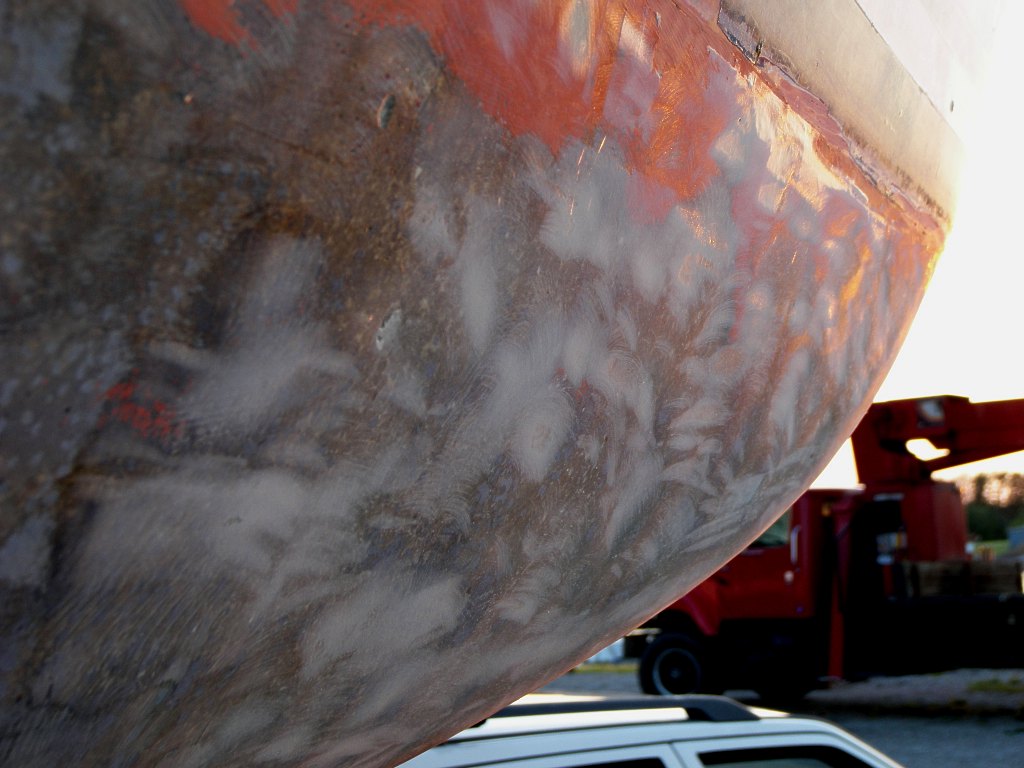
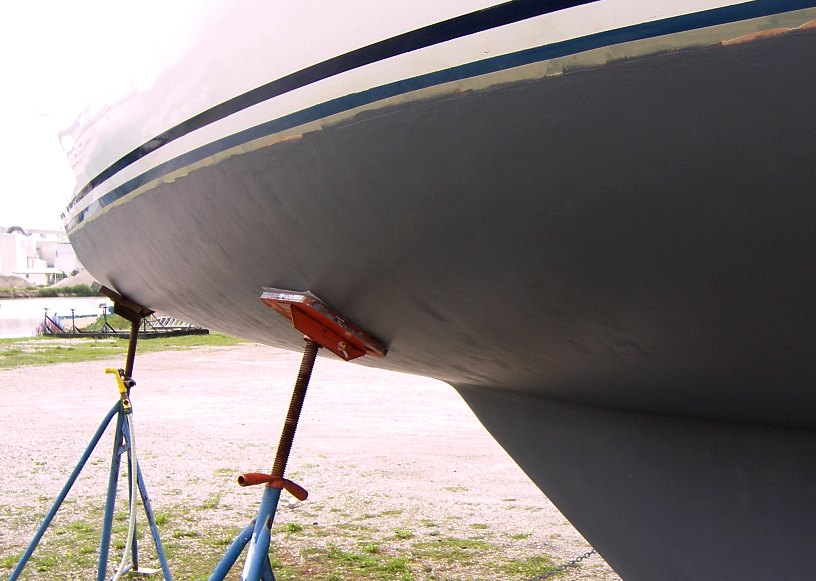
This photo shows the problems pretty well. This is an area near the starboard bow where the
barrier coat had started flaking off. I scraped most of this off with a hand scraper. I ground
off a bit to get a better idea of what I was looking at. You can see the swirls where I was
grinding. You can also see one spot of blister fill. Note the areas that look glazed. I think
when the repair work was done they coated the entire hull with some sort of resin (I don't know
what) before applying the blister fill and the barrier coat. This may have been on top of some
previous coating that was black - maybe VC-Tar? The original red gel coat is in there too. The
effect of this resin coating was to keep anything from sticking properly to the hull. That's why
the barrier coat was flaking off. And the blister fill had fallen out in several places leaving
shiny dime-sized holes behind.
Update: A while after completing the bottom job I came across some paperwork that came with the boat including the job order for the 1987 bottom job. It said they coated the entire bottom with a single coat vinylester resin before doing the fill and barrier coat to "seal exposed fibers before epoxy treatment." Thanks to the boys at North Bay Yacht Services in Annapolis for that. The entire job went like this: |
|
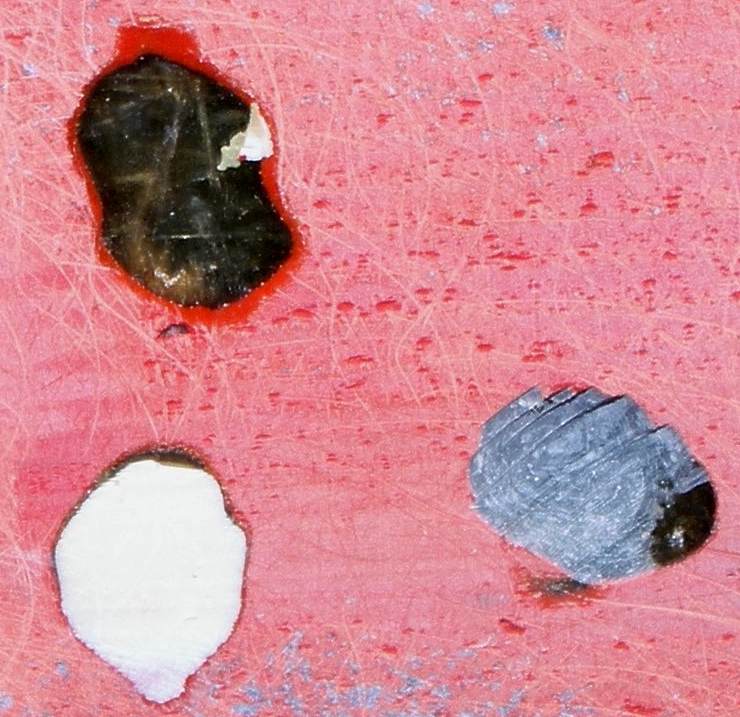
This photo shows three blister holes in various states. The lower left still has the original fill. I don't know what the fill was, maybe Marine-Tex. The upper left has had the fill fall out leaving the shiny hole behind. The lower right has been ground out using a dremel with a small drum sander attachment. The rough surface is what you want for the new epoxy fill to stick to. I filled these with a mix of West System and 406 silica filler. Before filling the holes I wiped them with acetone then wetted them out with neat epoxy (no fill). I sometimes mix in some 403 because I think it improves adhesion and reduces sagging. |

| This is a thru-hull hole that is going to be patched. The fiberglass has been ground away at a taper on the inside and outside. Round patches of biaxial glass will be layed in on both sides at the same time so there will be chemical bonding between the two sides of the patch. |
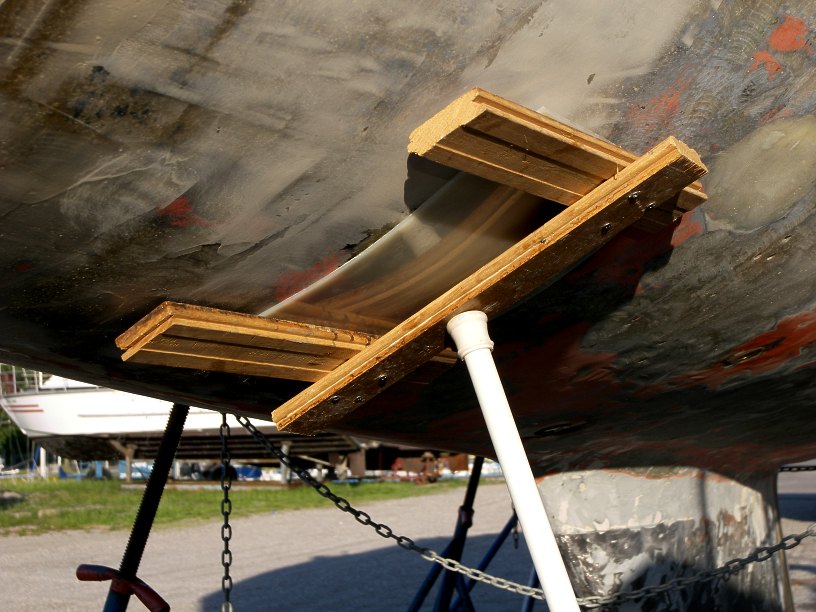
| I made this rig with some scrap wood, a piece of flexible plastic and a spring loaded curtain rod to hold the outer patch in place while the epoxy set to get a shape closer to the hull curve. |
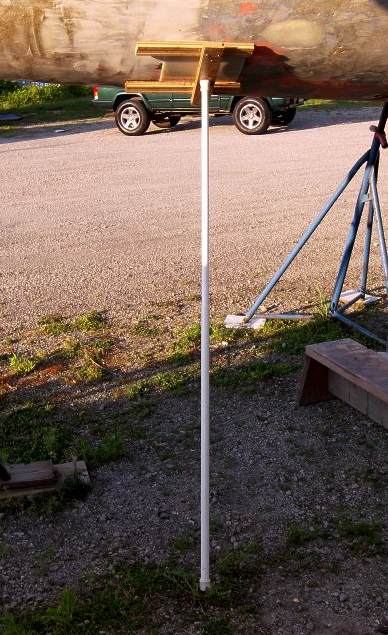
| A wider shot of the curtain rod rig. |
| The results are pretty good though I had about one layer too many in the patch. I started with a big patch and went to smaller and smaller but then put a big one over the top for a better finish. This got ground down a bit to match the level of the hull. |

|
Here is a shot after peeling the old barrier coat, some spot grinding of that glaze coat and removal of the blister fill. |
|
This is the same area as above after new blister fill and fairing.
Before and After Photos Together... |
|
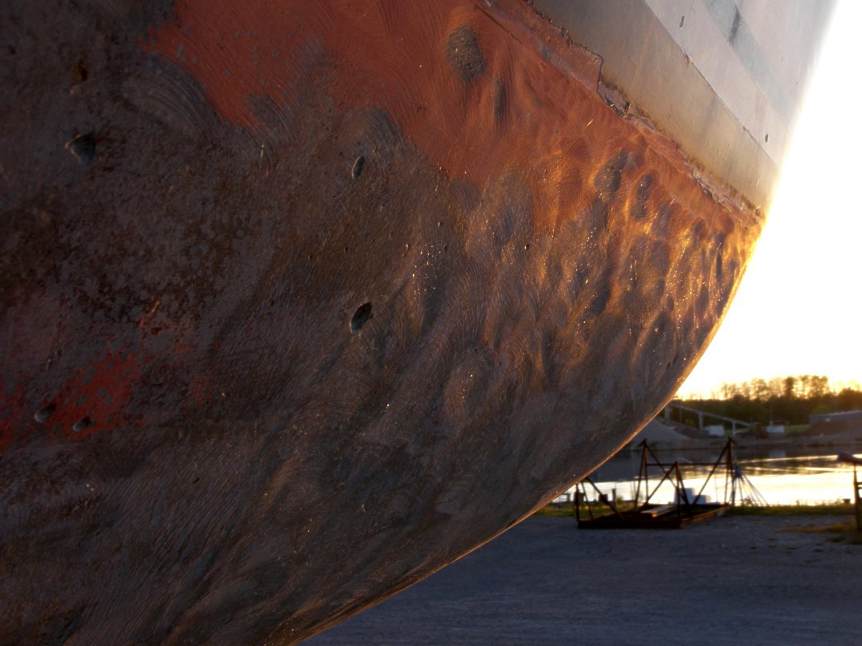
Here is a shot at the starboard bow after peeling and sanding. That low light at the end of the
day is great for showing how crappy the surface actually looks. Before and After Photos Together... |
|
Here is a wider shot after peeling. Before and After Photos Together... |
|
This is the same area as above after blister fill and fairing.
Before and After Photos Together... |

|
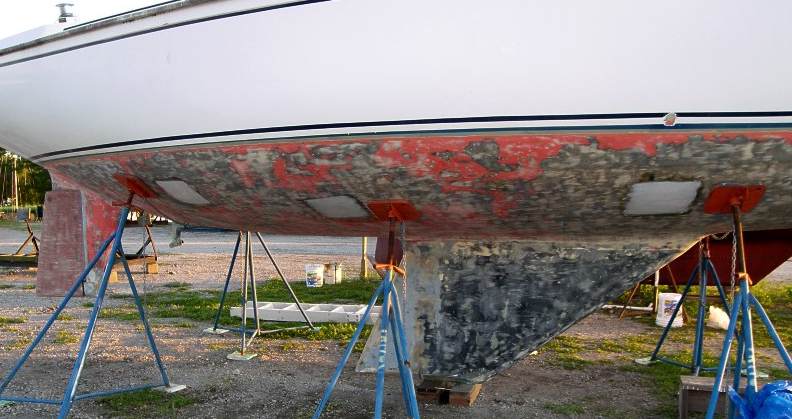
Here's a wider shot after fairing on the starboard side. The section from the first photo above is to the right in this photo. You see pretty well where the fairing is filling in peeler and grinder scars. The peeler scars are about 3" long and straight, the grinder scars are crescent shaped. |
|
The wider view. Fairing almost complete. |
|
Barrier coat applied to the stand locations. The barrier coat is 8 coats of West System epoxy. Coat 1 neat (no filler/additives), coats 2-5 with 422 barrier coat additive, coat 6 with 422 and white pigment, 2 coats with just white pigment.
Choosing a barreir coat |

|
Barrier coat over entire bottom. Epoxy was rolled on and then tipped with a foam brush (first coat was squeegied). It took about one hour from start of mixing to end of tipping to apply each coat. |

|
Barrier coat over entire bottom. After thorough preparation that took about 4 billion hours I applied 8 coats of West System Epoxy. 1 neat, 2-6 with 422 barrier coat additive, 7 and 8 neat. 6, 7, and 8 had white pigment added. In retrospect I probably could have added the 422 to 7 and 8. I thought the last two neat coats would make sanding back to get a smoother surface easier. And maybe it did but it was still pretty hard. Adding the pigment was a good idea. I applied the epoxy in two all-day sessions. Day one was port side, day two starboard. I had to sand the overlap at the centerline. It took about 50 minutes to apply a coat including mixing (that's a coat on one side of the hull). It was about 90 minutes from the start of one coat until it was ready to take the second. It just needs to have set enough to support the next coat. Tacky is good. In the warmer mid day hours it was quicker. I blended with 205 and 206 hardener depending on temperature. 75 degrees at coat 1, 80 at coat 4 and 77 at coat 8. It took about 3-1/2 gallons of 105 resin and how ever much hardener that would be. I worked in six to ten pump batches. |
|
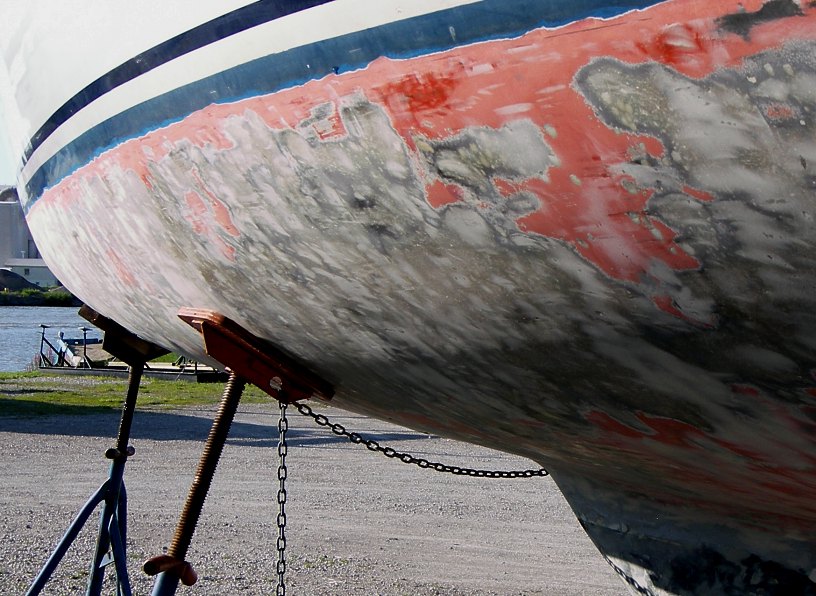
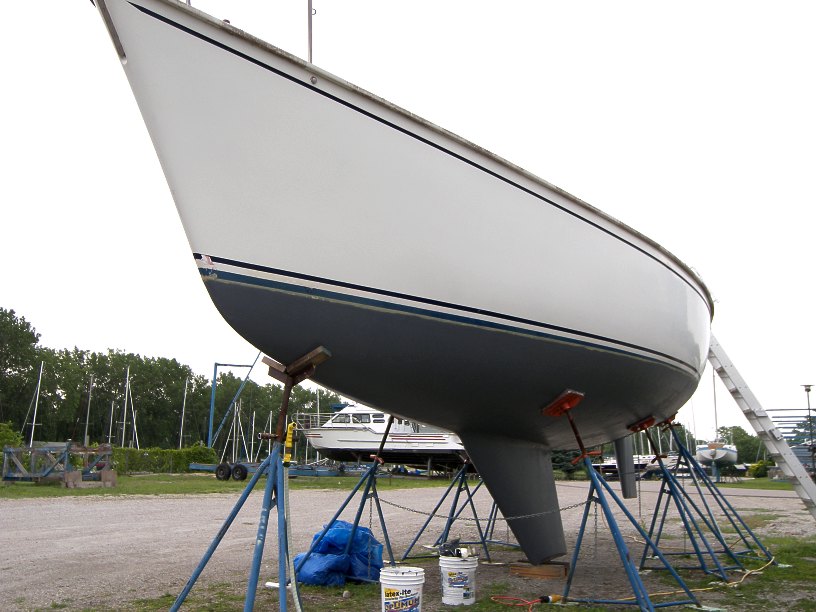
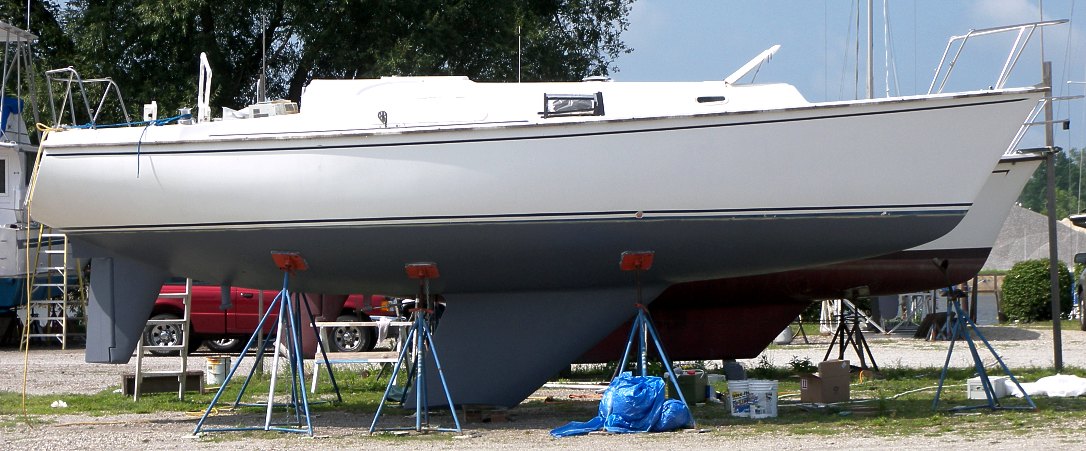
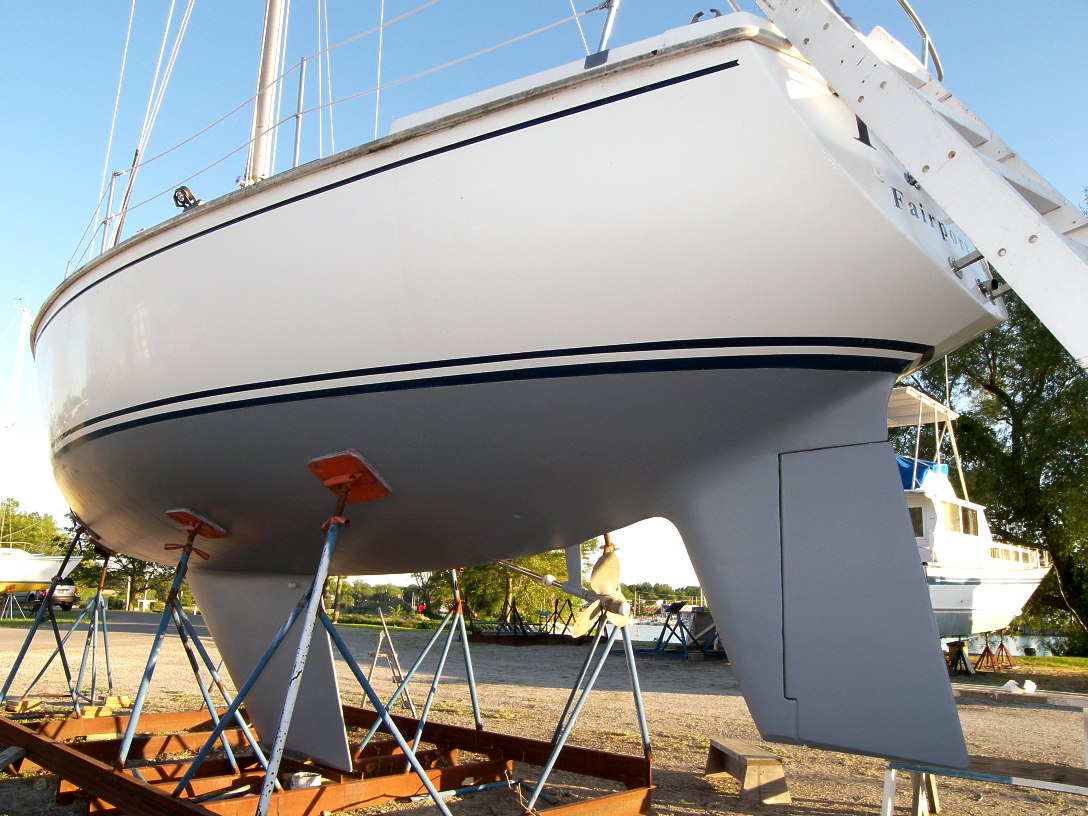
Bottom paint applied. The paint is Pettit Vivid, four parts white, one part black. It took 1 gallon and 1/2 quart to roll two coats. I used the paint straight, I think 10% thinner would have hellped with the coverage and finish quality.
Paint note 5 weeks after launch...I launched in late July on L. Erie. Water temps are about 70 degrees. This paint has a slime reducer. After 5 weeks I had a lot of slime on the bottom. It's hard to tell if it would have been different with the VC Offshore I used to use in the same waters. According to the guy who pressure washed all the boats coming out of the water at the end of the season the slime came off mine a lot easier than usuals. |
|
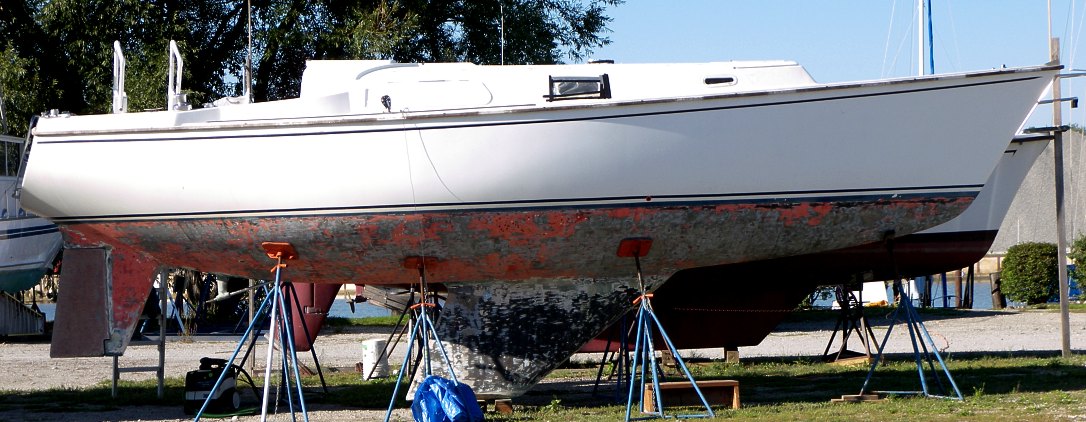
Bottom paint from broadside. Before and After Photos Together... |
|
This is a view of an area seen above.
Before and After Photos Together... |
|
This is after sanding applying 2 coats of fresh paint in 2010. This time instead of mixing white Petit Vivid with black I took the gallon of white to a local paint shop and had them tint it. I only needed one gallon and the tinting was about $7. A quart of black to tint would have been $65. I got two full coats from the one gallon of paint. |