|
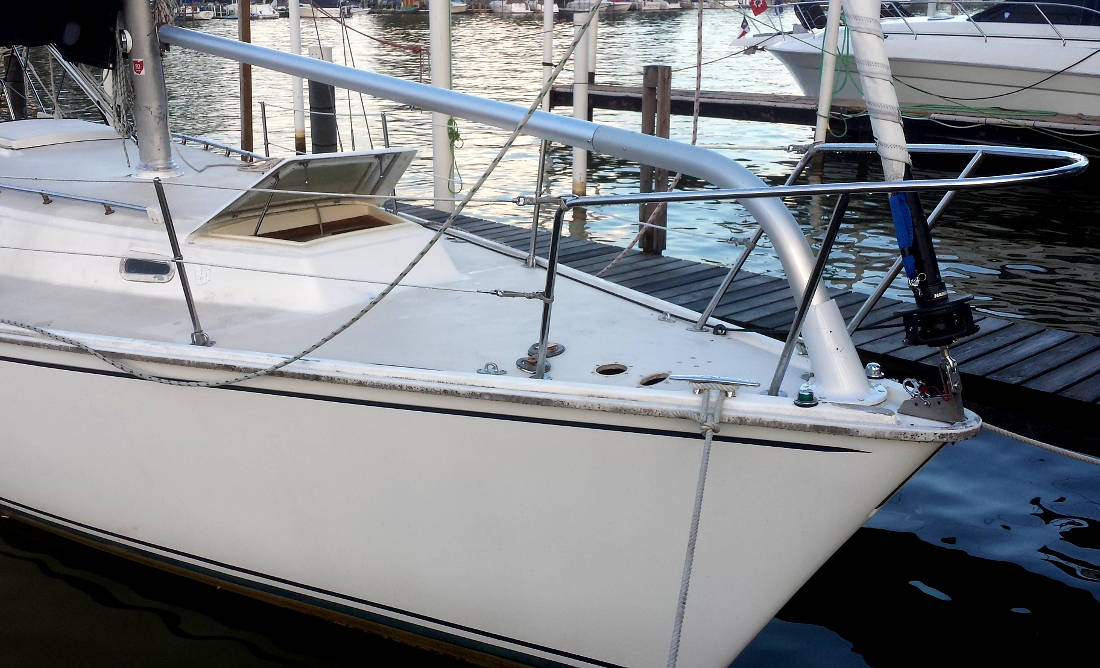
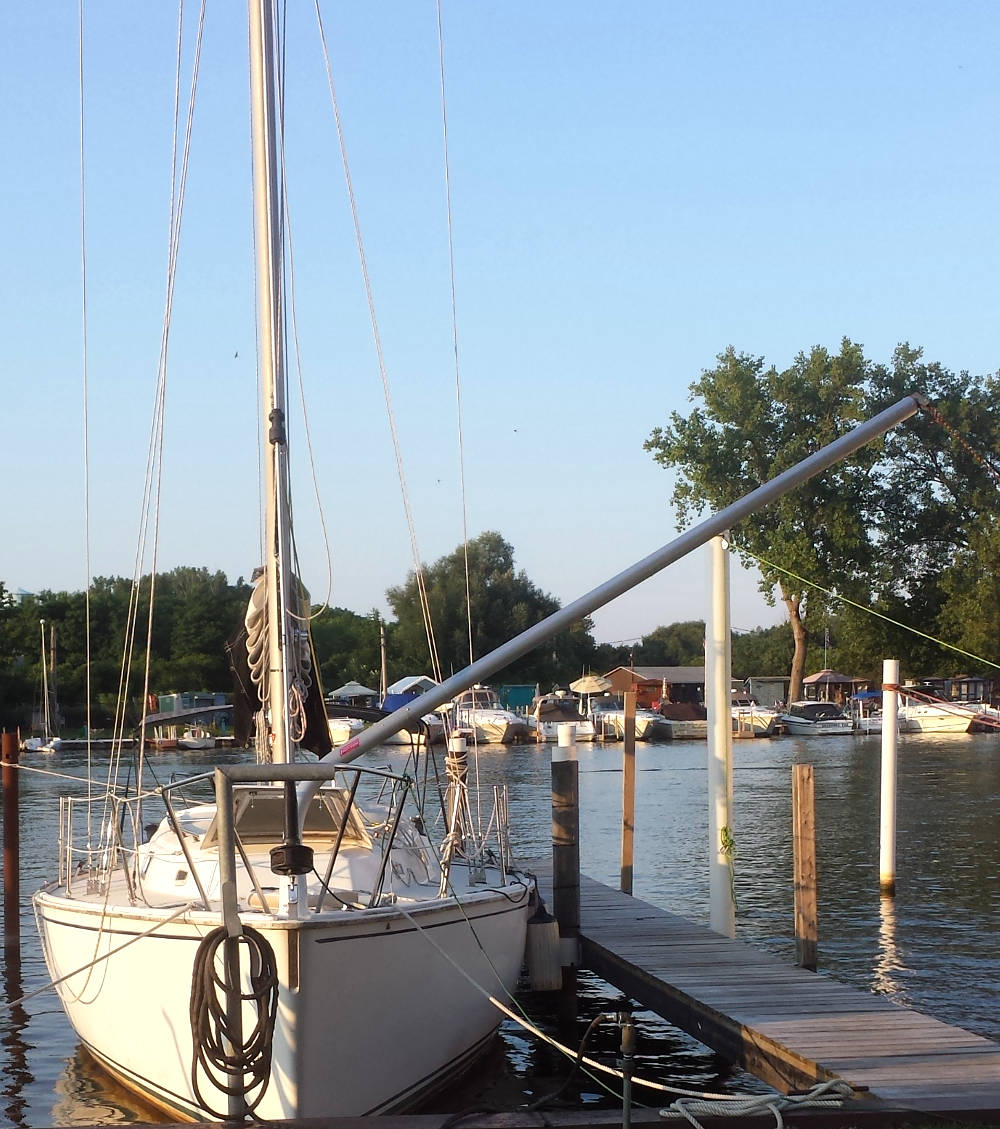
| Pearson 10M Hoyt Jib Boom Installation Details |
To mount the jib boom I needed to make a good sturdy backing for it on the underside of the deck. This meant working up in the forepeak where access it difficult. I started by making a platform that I could lay on and slide into the forepeak through the opening at the foot of the v-berth. It as was a squeeze but I just managed. It was actually a pretty comfortable set up for working in there.
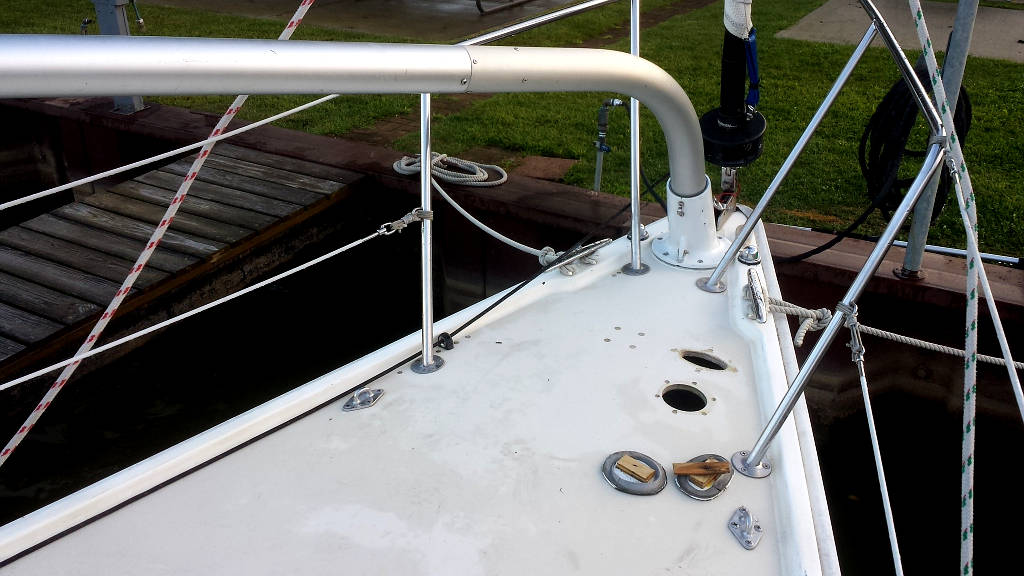
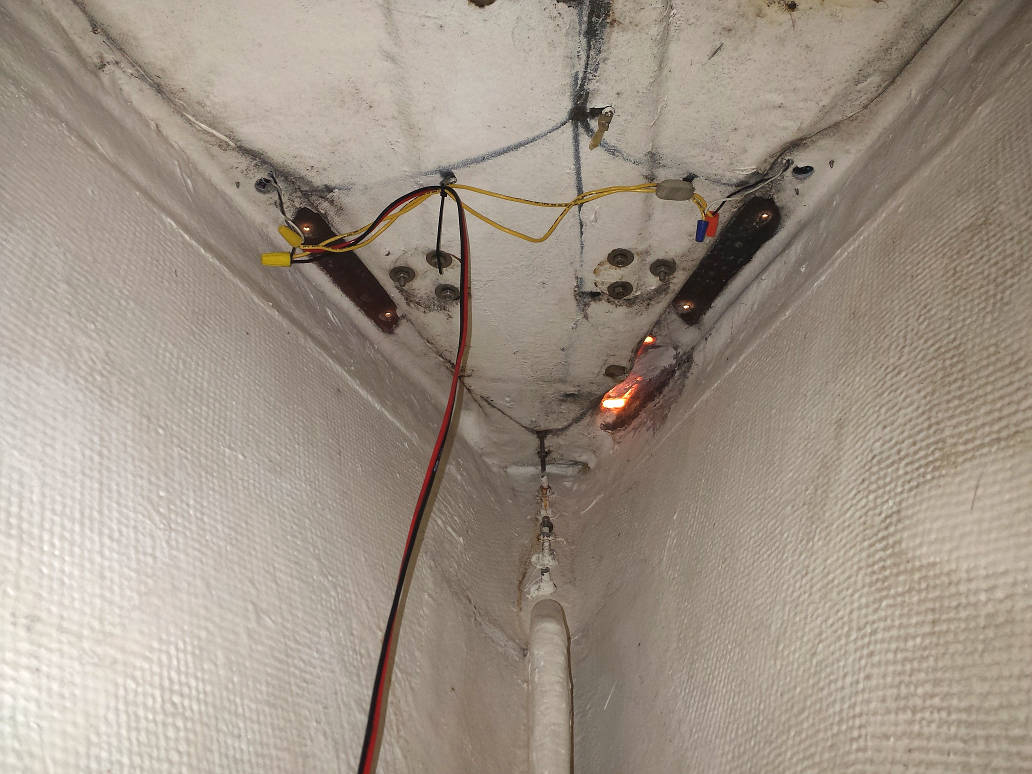
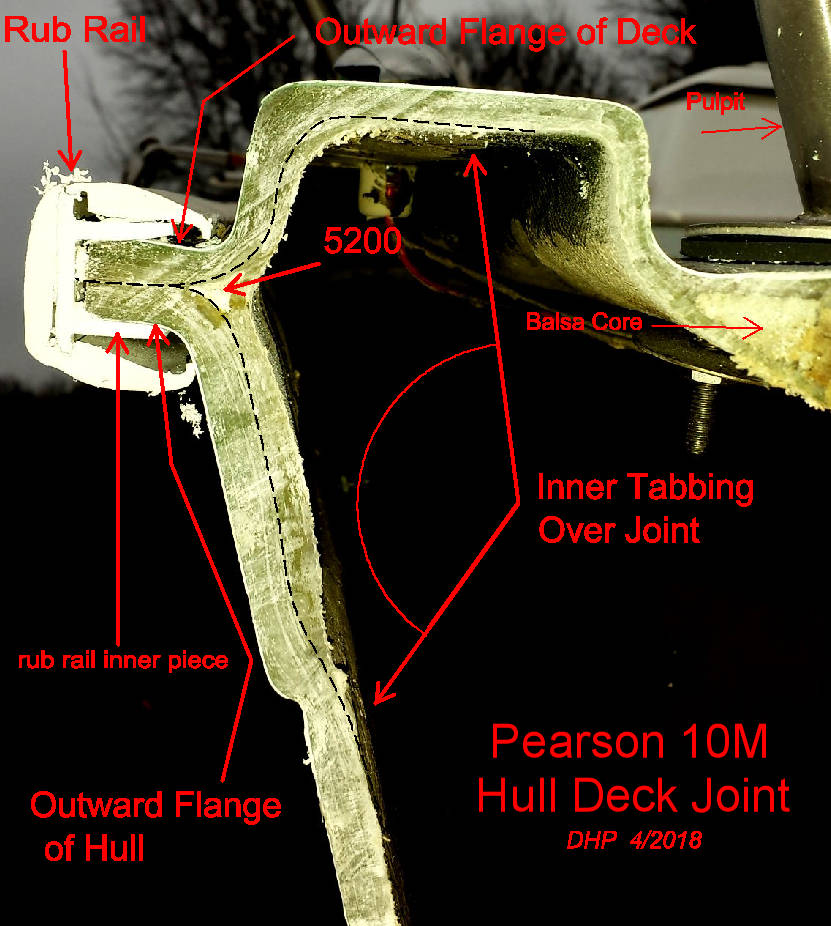
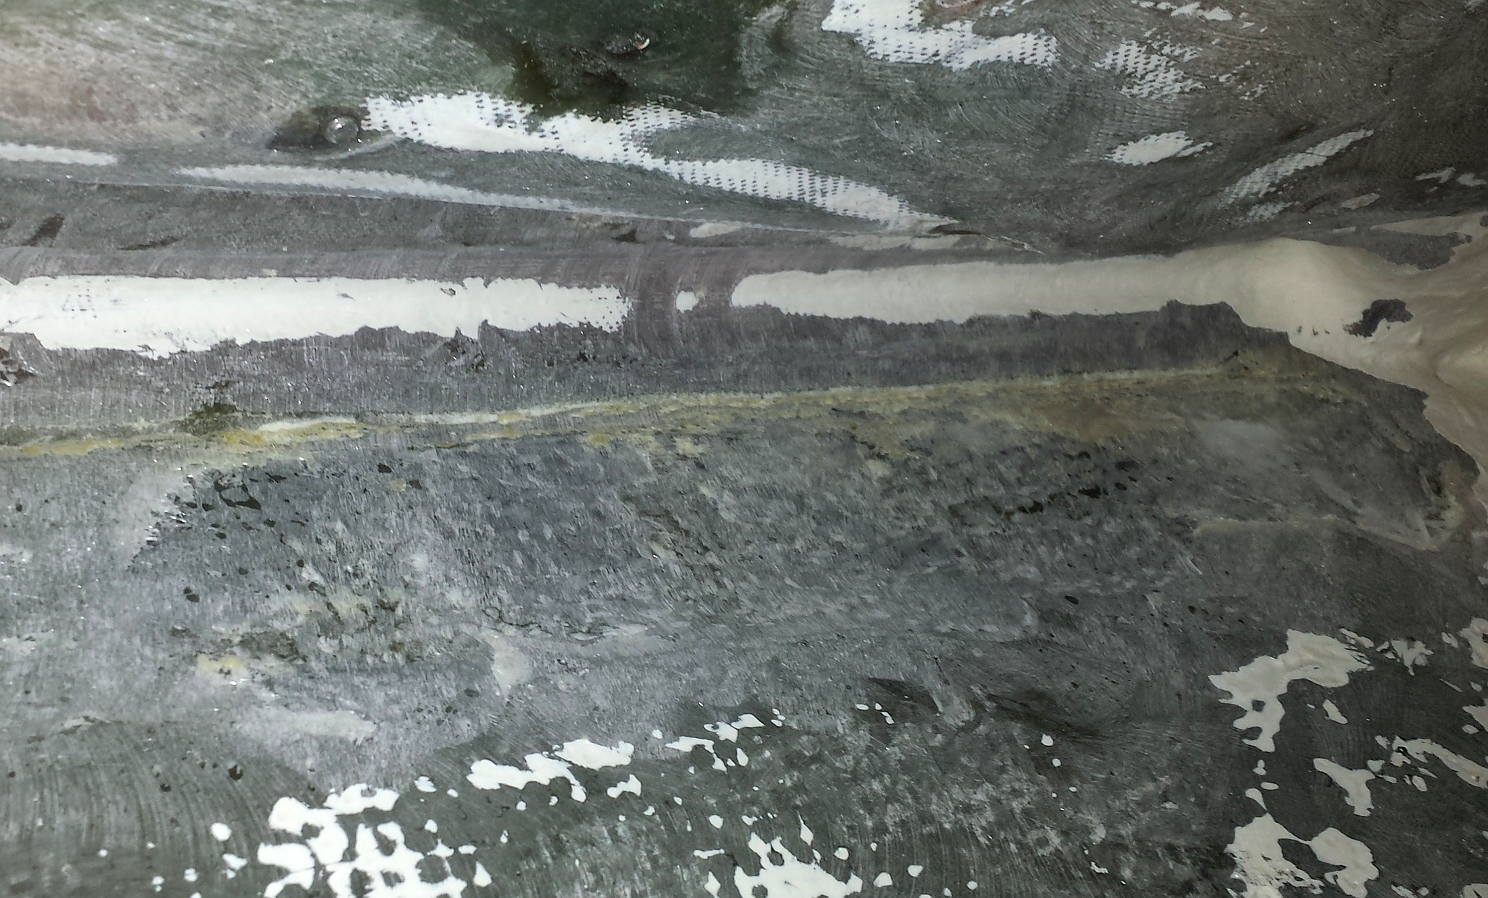
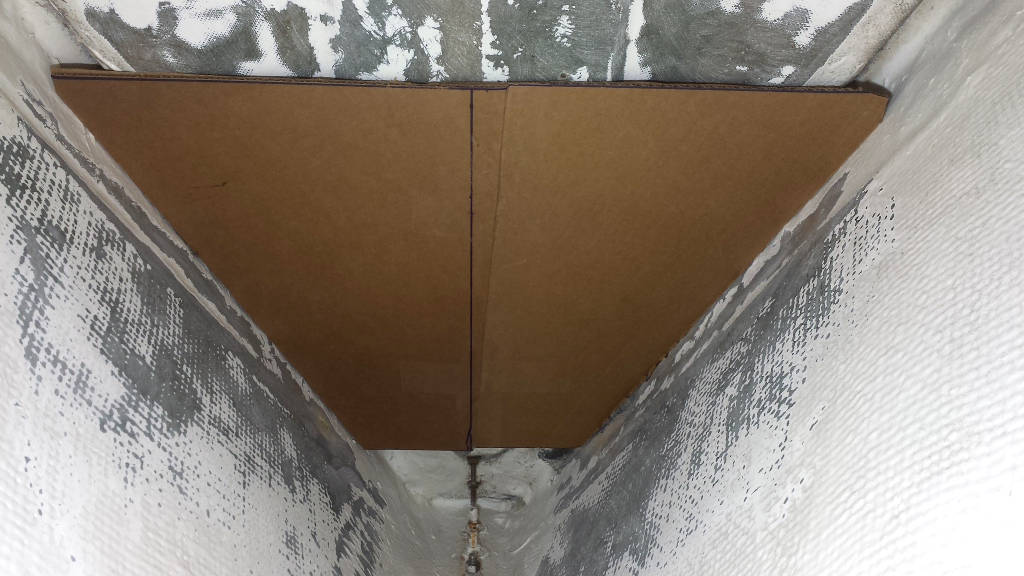
The forepeak was sprayed with gel coat at the factory. There is an 8" wide plywood section of coring running down the middle of the deck. The bow pulpit mounts partly through this and partly outboard of it. The OEM bow cleat mounts too it too. In the photo below you can see all that plus the navigation lights (with some first class wiring), the chock mounts, and a bubble in the tabbing over the hull-deck joint forward on the starboard side. This was a pretty hard spot to reach and was probably done by a guy called Fino.
The tabbing over the hull-deck joint was pretty good overall but it was secondary bonding with ployester. I would be tabbing over this so I decided to peel off the old tabbing and re-do with biax tape in epoxy. The whole job is done in one process to get primary bonding between all the new layers.

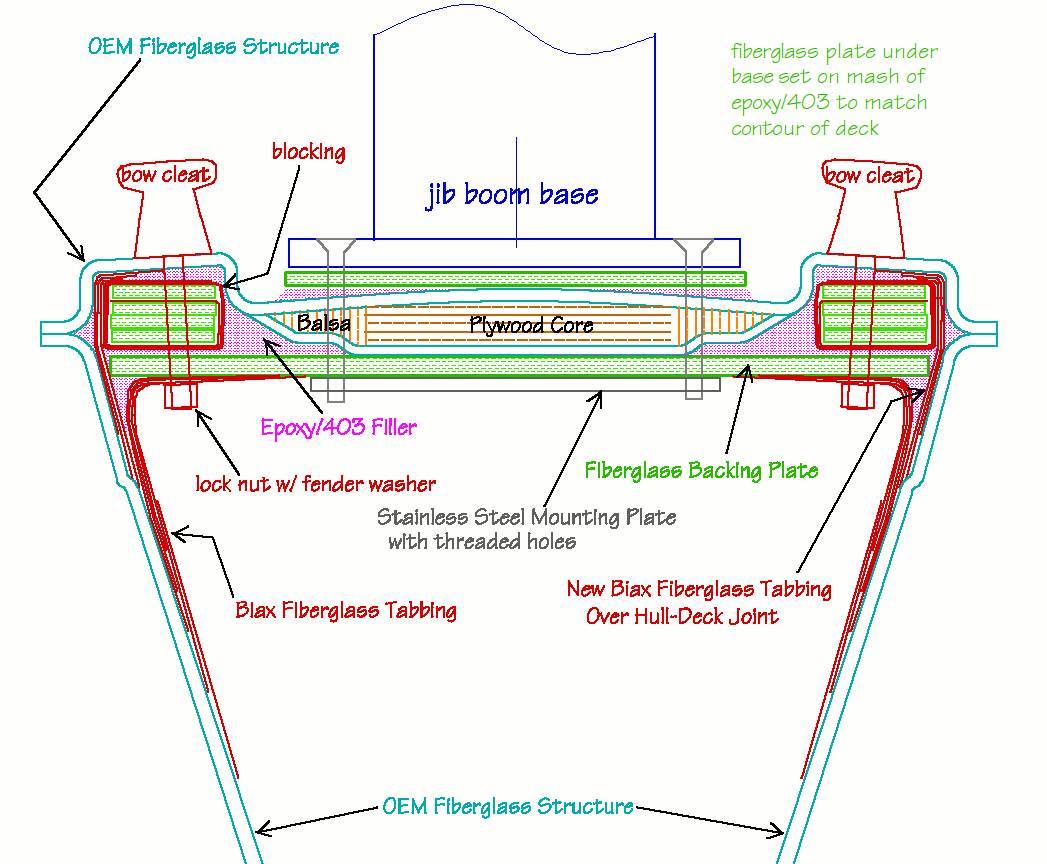
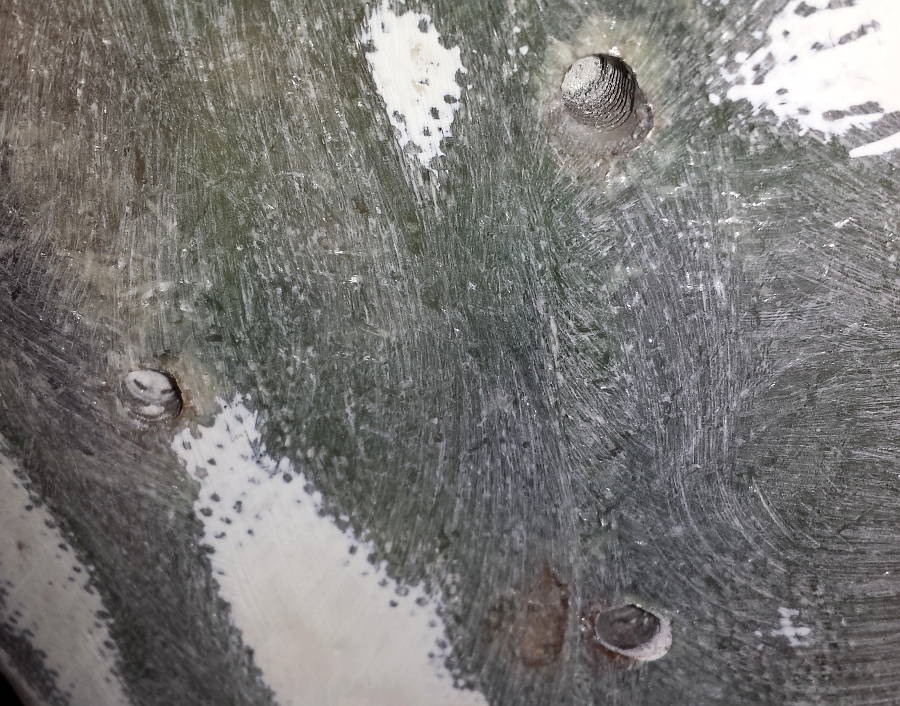
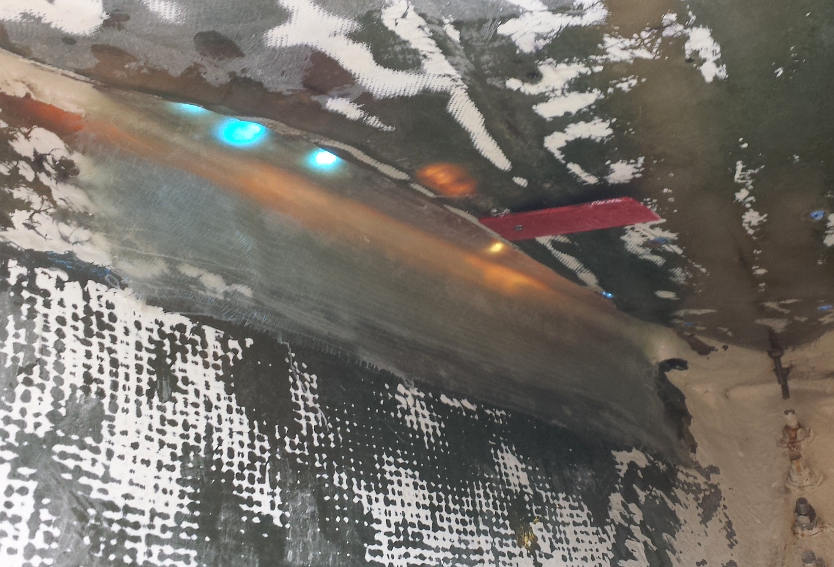
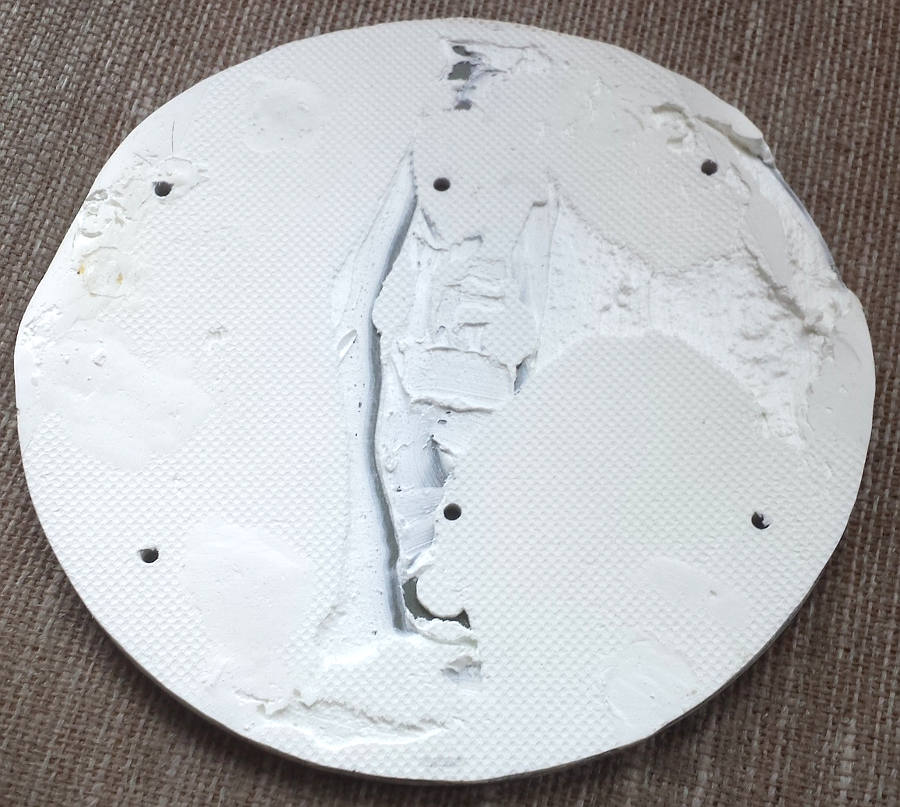
To prep for the installation of the backing plate I ground the surfaces of the underside of the deck and the inside of the hull to 80 grit or coarser. I used a rotary disk sander/grider for most of it and a 30mm belt sander in the harder to reach places. Both have dust collection and I wore a protective suit, face gear and proper respirator (not just a dust mask). I also had an exhaust fan pulling air out of the forepeak through the 4" anchor line deck plate. In the photos below you can see the prepped surface. The new backing plate covers the area where the forward pulpit fasteners come through the deck. In the third photo you can see the threaded holes for these fasteners mount.
The last photo shows where I peeled the old tabbing off the hull-deck joint. This is an important step. The original tabbing done at the factory used polyester resin applied after the hull and deck were fully cured. This means the tabbing is secured with only secondary bonding with poyester resin. There is nothing wrong with this but epoxy bonding is significantly stronger in secondary bonding than polyester. If the new epoxy bonding was done over the old polyester the new epoxy tabbing would be only as strongly bonded as the underlying old polyester tabbing. To take advantage of the higher strength of the epoxy requiers that the polyester bonded tabbing be removed. The result is a much stronger reinforcement of the deck with the fiberglass backing plate epoxied to the underside of the deck and tabbed to the hull on both sides.

I am also changing the bow cleats. The new mounting is right on the toe rail and the cleat studs will go right through the new backing plate. There is blocking/fill in the toe rail hollow to handle the bow cleat mountings. These are Schaefer 10" Stud Mount Cleats. The cleats are mounting were the navigation lights were. The lights were re-mounted forward of the cleats (and also upgraded to LED).

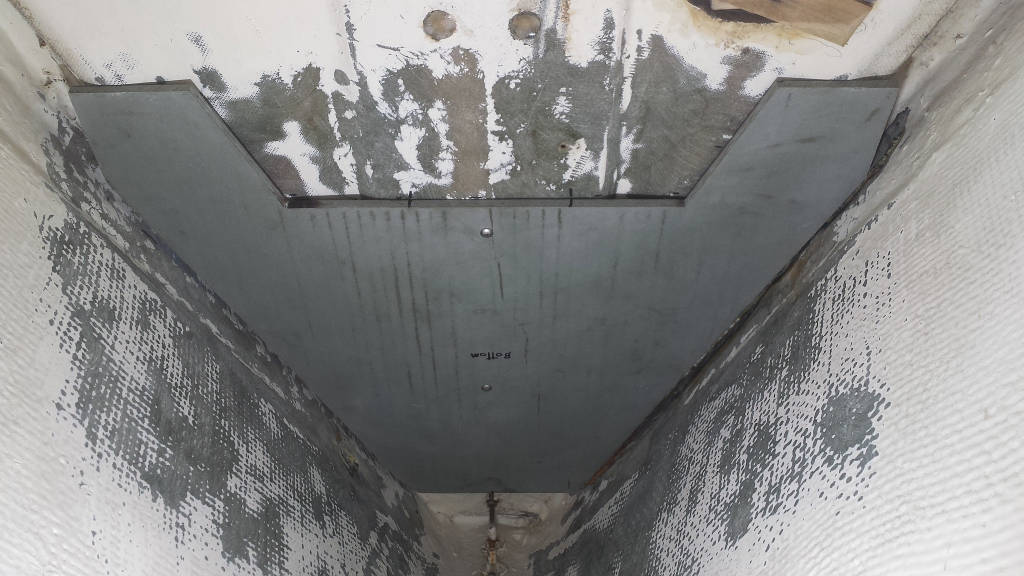
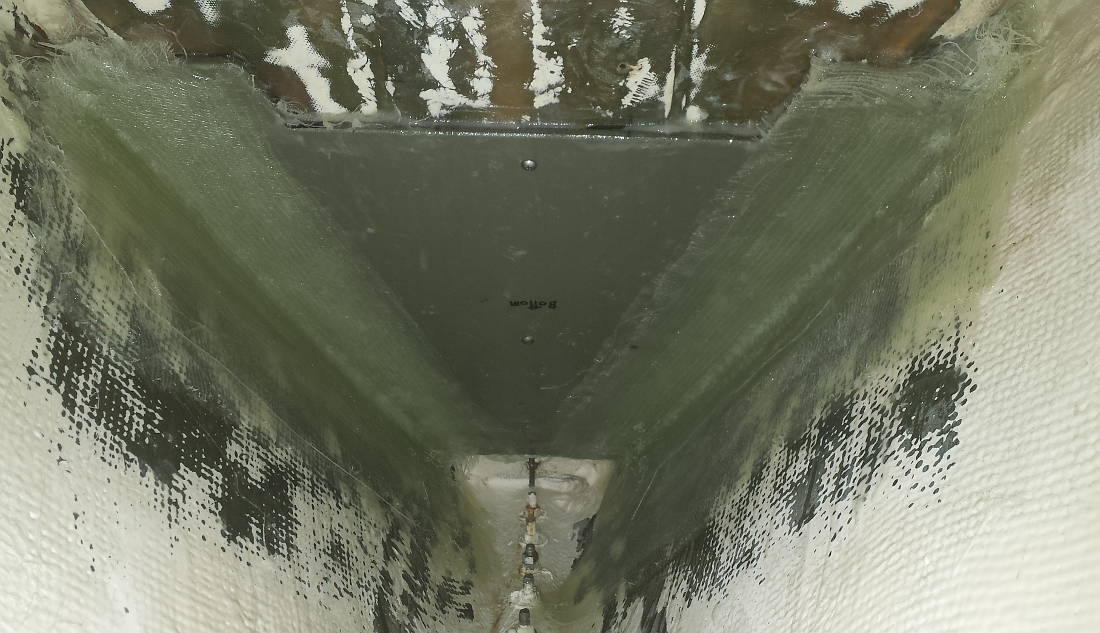
The underside of the deck is not flat. It's thicker in the middle under the plywood core section and has a hollow outboard that forms the toe rail. The backing plate is made from 3/8" structural fiberglass and is glued to the underside of the deck with epoxy. The void areas between the backing plate and the deck are filled with a mix of thickened epoxy, structural fiberglass blocking and biax fabric. The plate extends out to meet the hull where it is thoroughly tabbed with biax fabric.
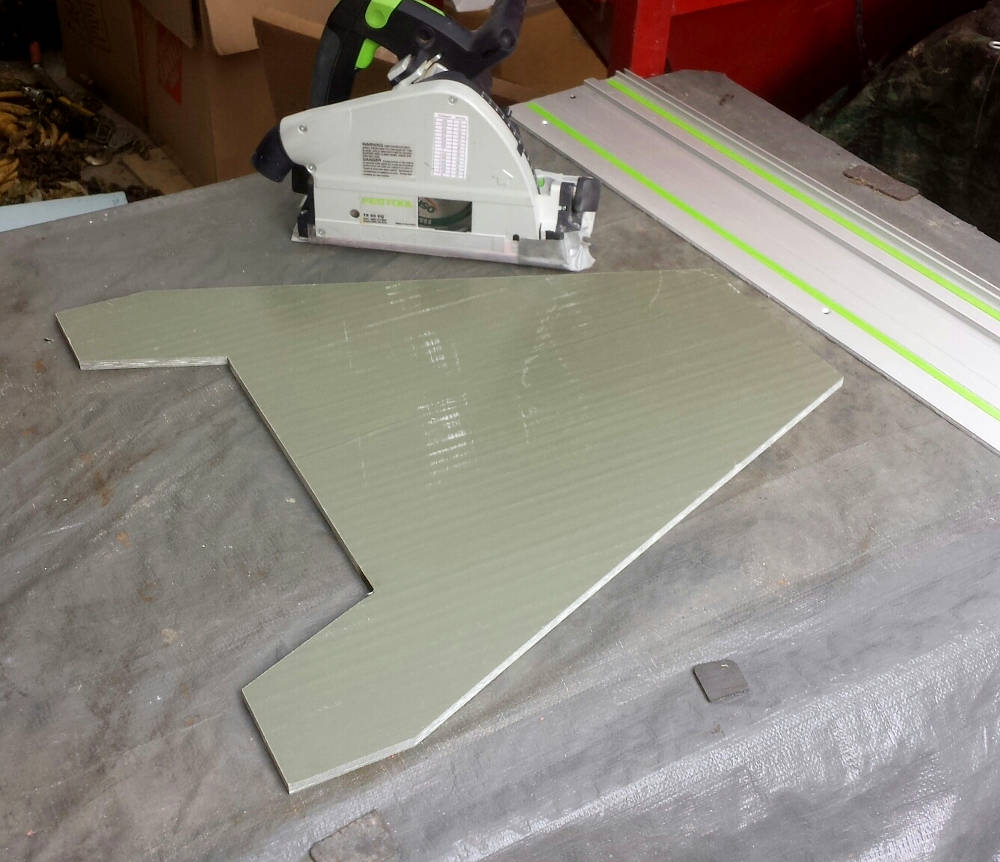
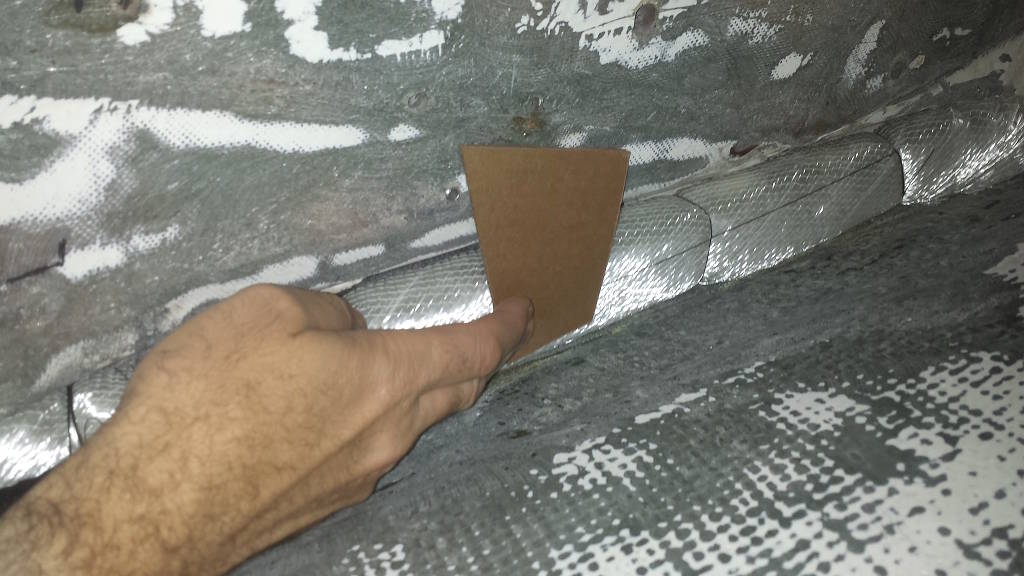
I made a template from cardboard. Getting the angle is easy. I cut two pieces of cardboard that overlaped and set them in against the hull and taped them together. After tweaking the shape I cut the backing plate from 3/8" structual fiberglass. To fit through the 13x14" opening in the v-berth forward bulkhead, one dimension of the backing plate is limited to 19". The plate is 19" x 24 overall plus the ears at the aft end that better cover the mountings for the bow cleats. Some of the ears got trimmed back in the final plan. I drilled holes in the backing plate to pump in thickened epoxy using a caulk tube. Wood dowels were used to plug the holes. I made more holes than I needed and the ones outboard didn't leave enough room to get the caulk gun in so close to the hull. I could have drilled the holes at an angle for that but in the end I didn't need them as the more inboard holes alowed the filler to flow all the way out.
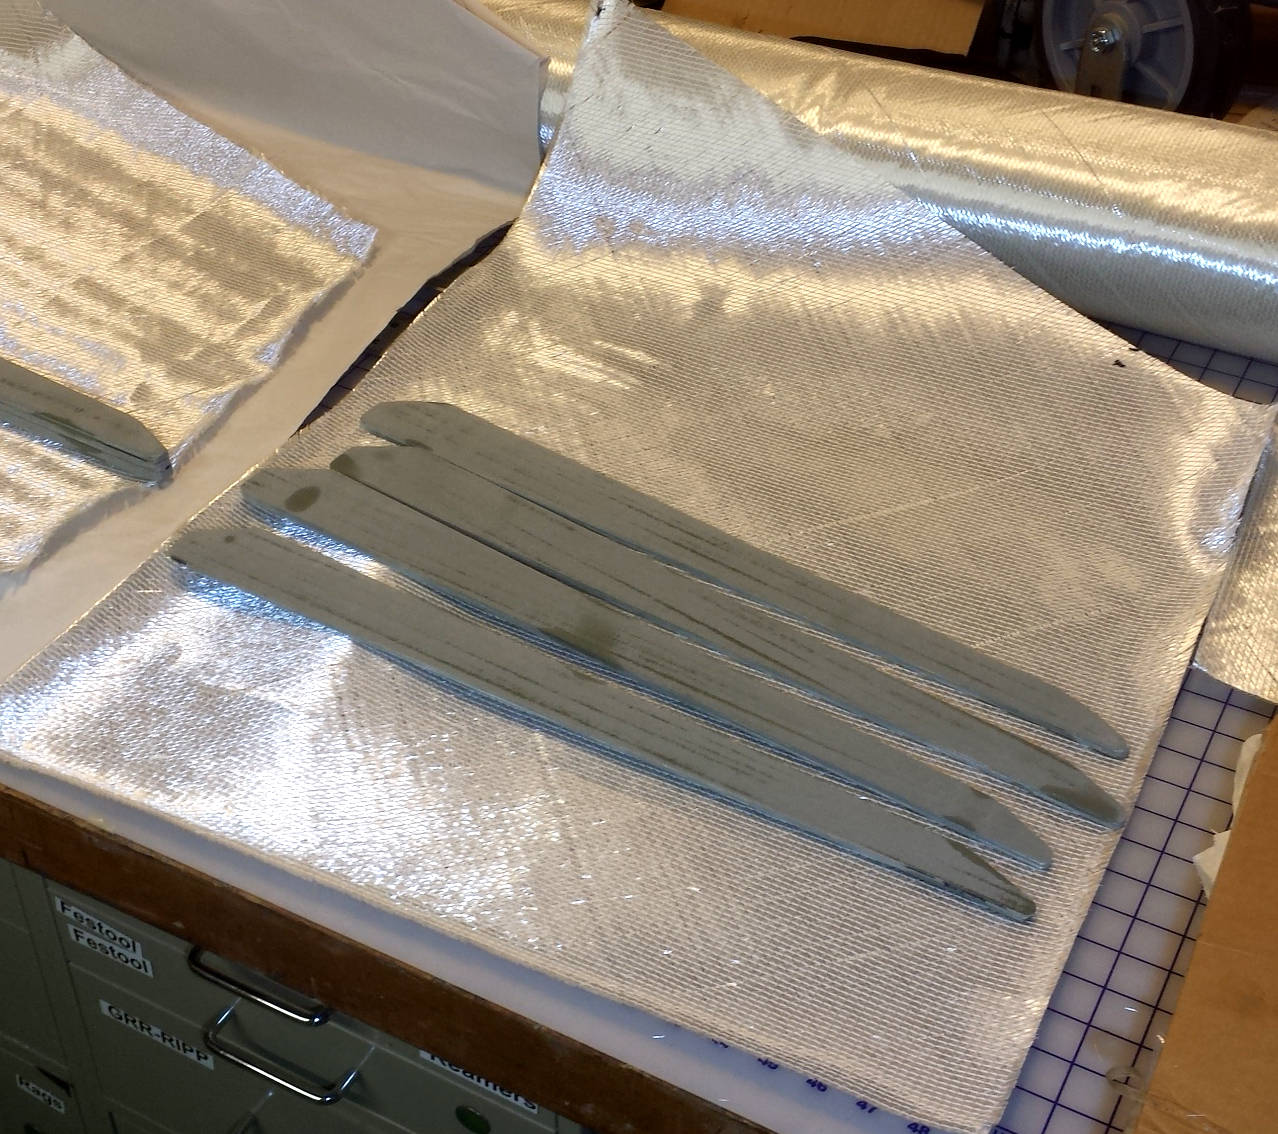
For the toe rail fill I used some structural fibergalss strips to take up a lot of the volume to prevent the epoxy mix from getting too hot as it cured. I wrapped the blocking with wetted out biax fabric and set it in places in a mash of thickened epoxy. I had some little tabs to hold it in place until the backing plate was in position.


The layup of the new hull-deck joint tabbing, the toe rail blocking, the backing plate, the void filler, and the backing plate tabbing was all done as a hot coating process. That means each part was done before the previous had fully cured to get primary bonding between them. The hull-deck tabbing was first and the backing plate tabbing was last. Some of the fill sections were fairly thick and structural fiberglass blocking was used in the toe rail to decrease the volume of fill and ward off the potential for things getting too hot. Things did get warm as I was at the last steps but not too warm. I measured a temperature on the bottom surface of the plate of about 115F.
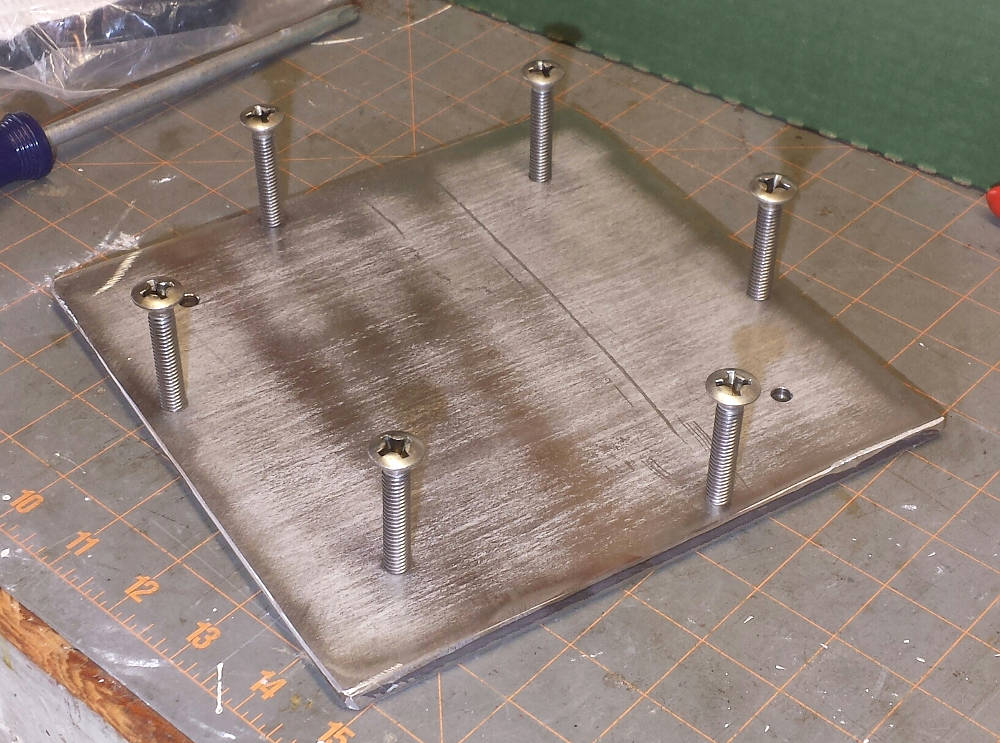
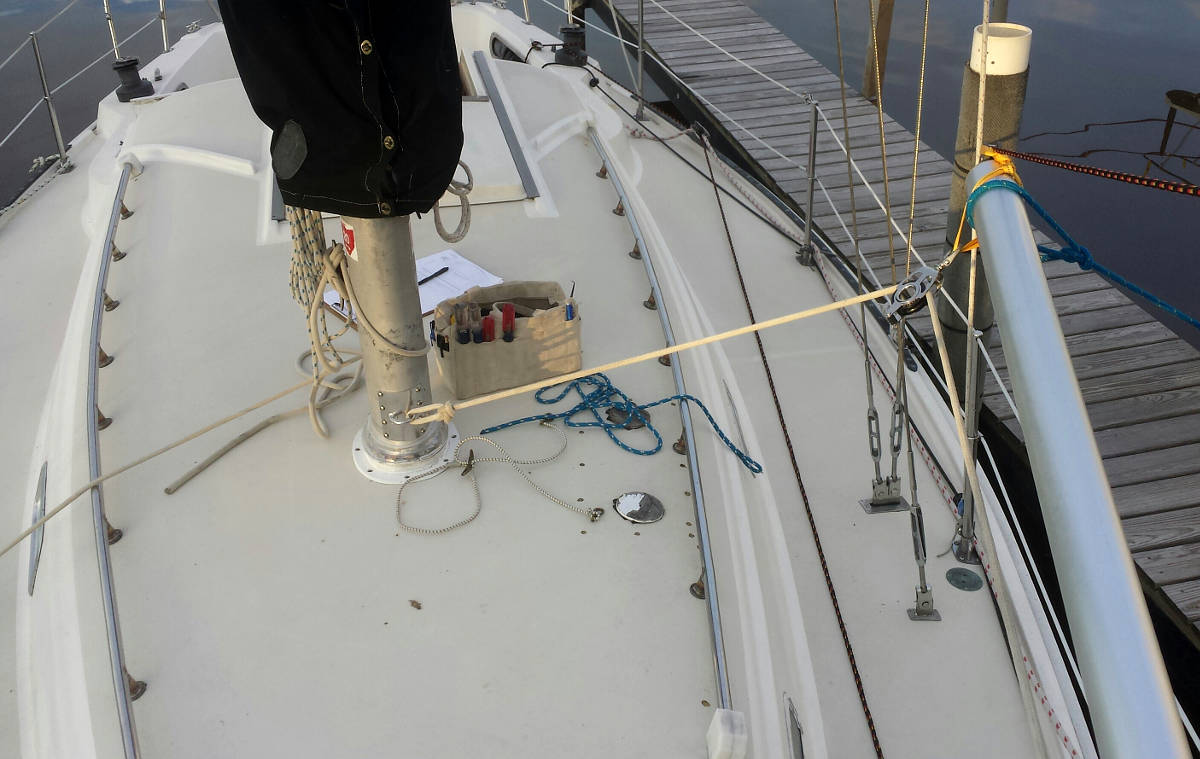
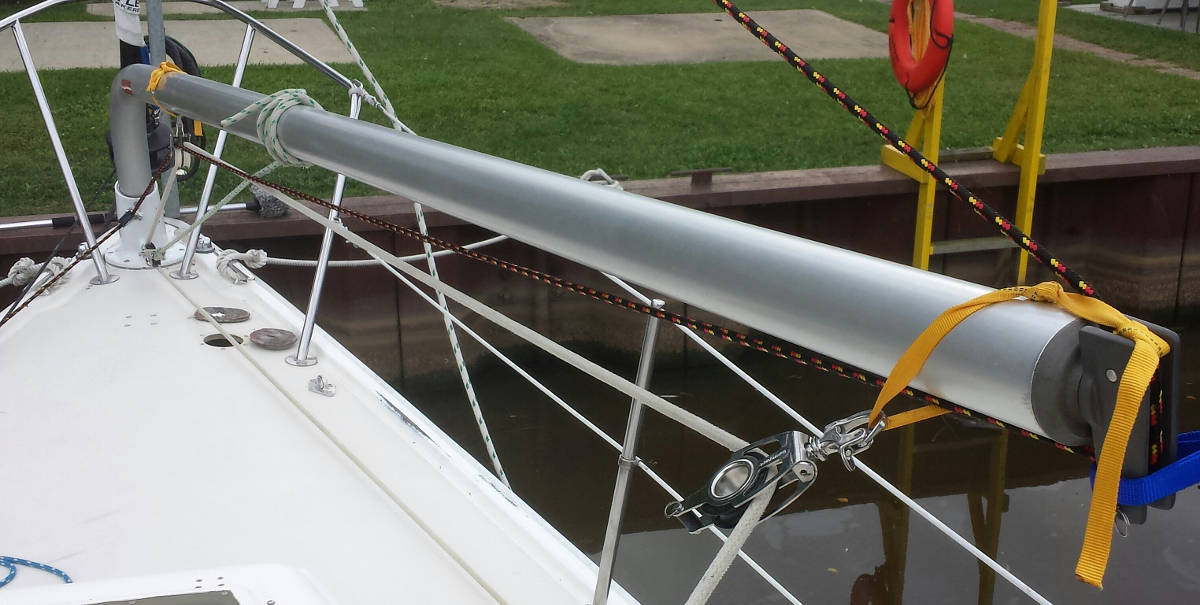
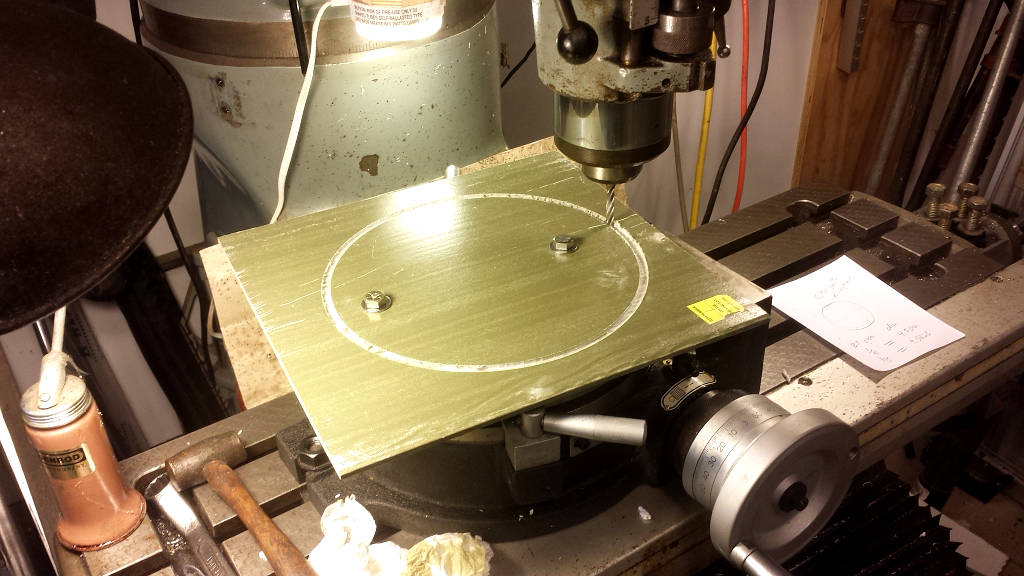
For the mounting on deck I made a backing plate of 1/4" structural fiberglass and used thickened epoxy to cast the bottom of the plate to fit the camber of the deck.
I cut the plate out to match the boom base. I used a milling machine with a rotary table. I could have done that with a jig saw but it would have used 2 or 3 blades (the fiberglass is very tough on blades) and wouldn't have been as good and round. I drilled and tapped four holes in the plate for 1/4-20 screws to make it easy to get the plate properly level on the deck.
To prep the deck I washed it real good then compounded the non-skid using a round upholstery brush on my festool sander. That worked really well and I'll try it on more of the deck. Then I waxed the section and then layed on another thick layer of wax.
I mixed up epoxy with 406 filler and white pigment and slathered that over the bottom of the plate (which I had prepped by sanding to 80 grit). I laid it on the deck set the level with the screws (which were alsdo thoroughly waxed) and cleaned up the excess and smoothed out the edge.
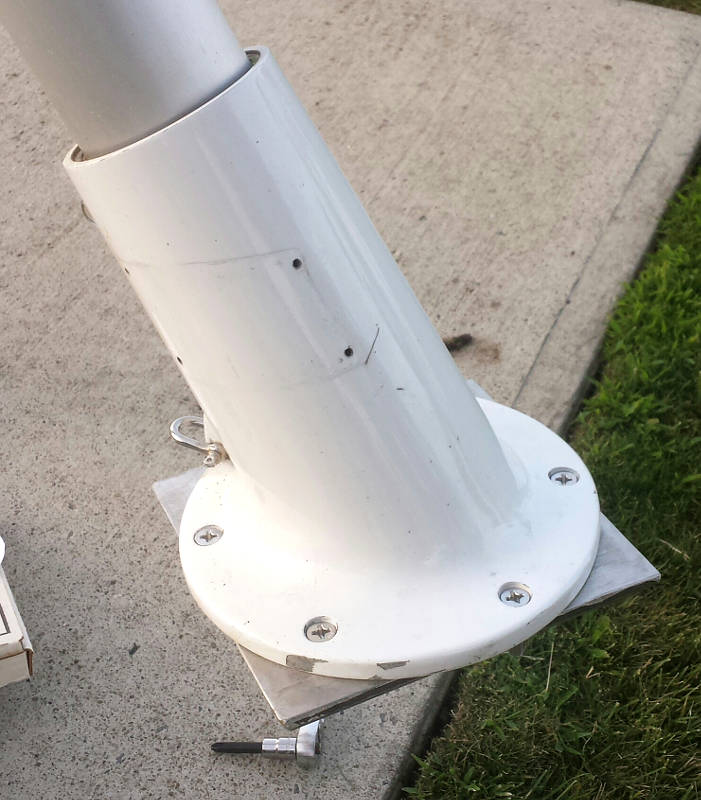
The next day I drilled a couple holes for counter-sunk screws to locate the plate and then turned the four leveling screws in a bit at a time and the plate popped right off with no epoxy left on the deck. The non-skid pattern is imprinted on the epoxy and the plate locks right in when you place it back on the deck. The fill was good but not complete so I'll add some more and do the procedure again. That's probably not needed for strength but it will keep water from having a place to collect under the plate.
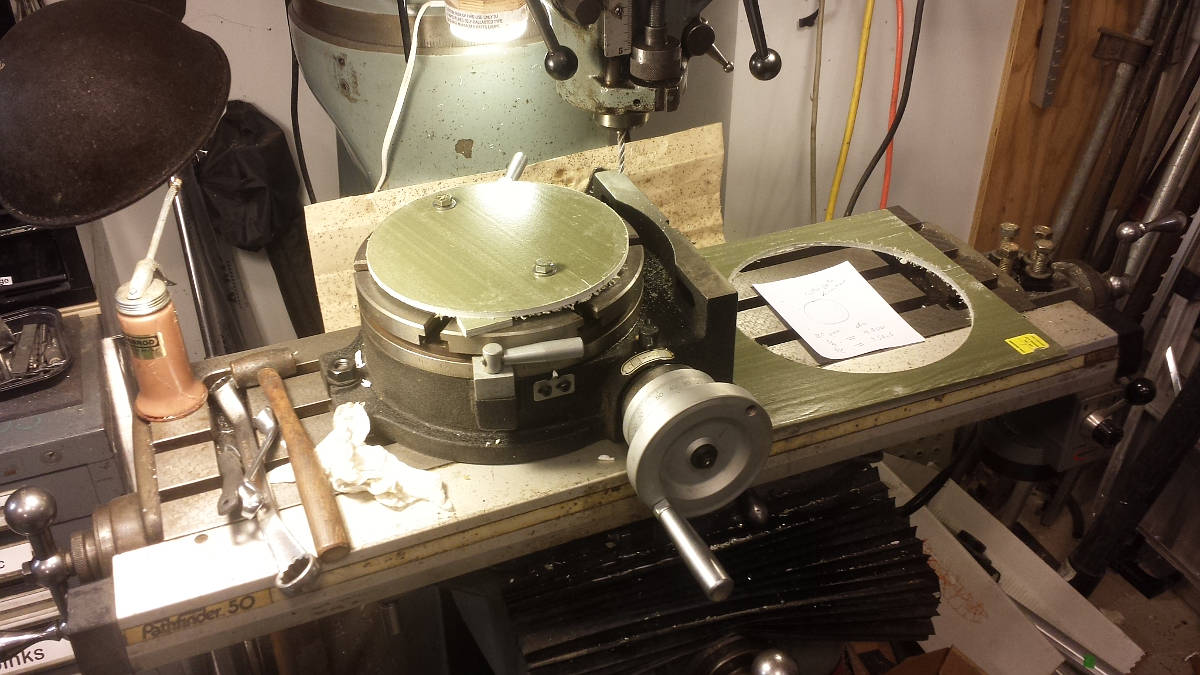


I made a template in a CAD drawing for the hole postions on the deck plate. I aligned this on the plate and used a center punch to mark the positions on the plate. I used a drill guide to make the holes as perpendicular to the plate as I could. The fit is good but the holes need to be oversized a bit to allow some room to align with the SS mounting plate that goes under the deck. The fasteners are 5/16 and the holes are 11/32.
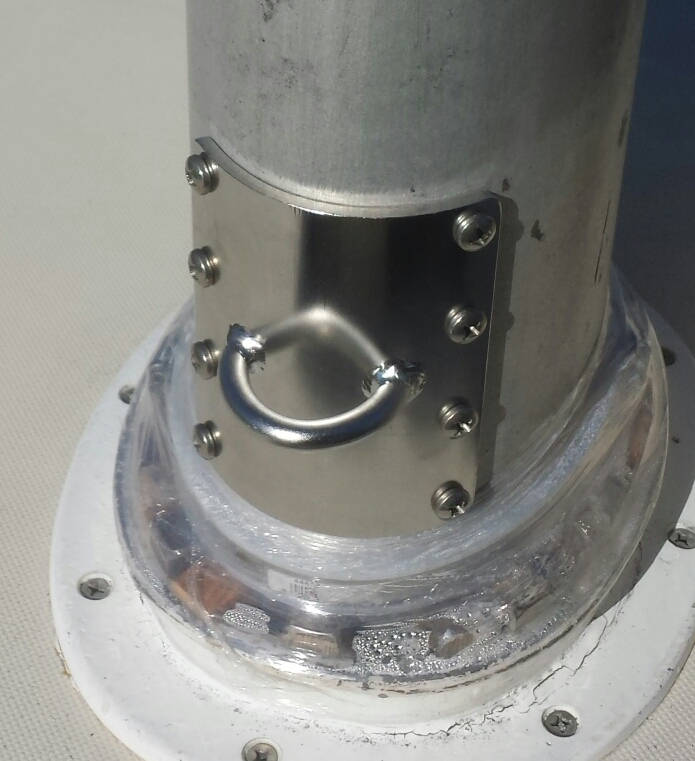
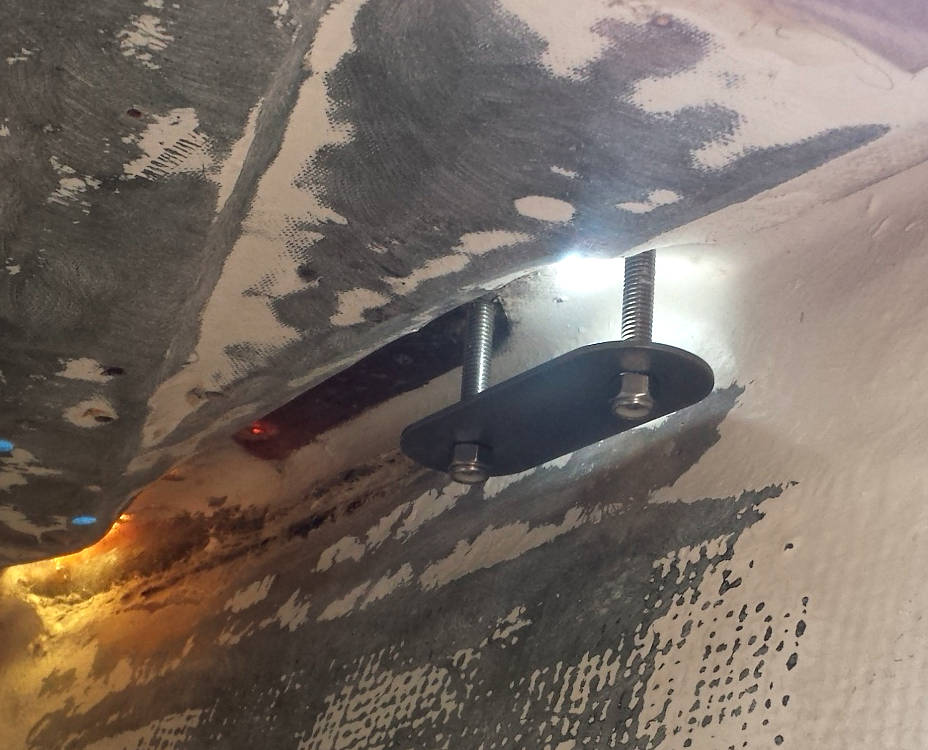
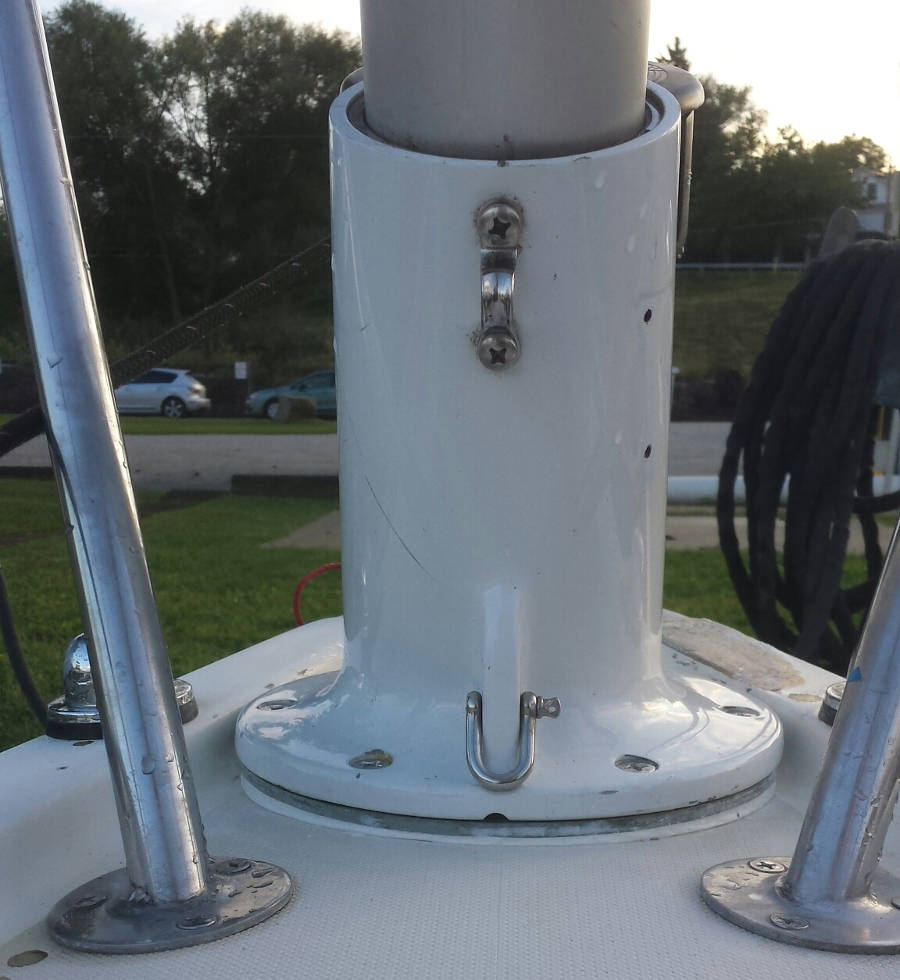
Below deck there is a 1/4" thick stainless steel backing plate. The mounting plate has threaded holes for the fasteners and is itself fastened to the underside of the deck. This way the jib boom can be mounted and dismounted from above by one person.