
|
| New Rigging |
Replacing all the rigging isn't cheap. I got a very good deal and paid about 1,750. That's about the same price as a new sail, maybe a bit less. If you think about it that way it doesn't seem so expensive. No one would think you were wasting that money on a new sail. Why should they think it's a waste on new rigging?
|
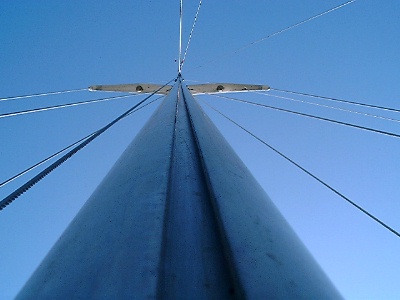
Mast The 10M mast is a Sound Spars 8755 (Mast Section: SS-8755MB) tapered at the top (possibly by Pearson). According to RigRite It is the same section as used on the P36 and 424. RigRite sells parts for the mast including a mast boot that fits over the special Pearson cast deck collar. www.rigrite.com |
|
|
Wire I made two changes to the wire. I downsized the headstay and backstay from 3/8 to 5/16. There were two reasons for this change. Any rigger will tell you that a 3/8 stay on a 33 foot boat is big time overkill. This is a typical size for a 40 footer (the P40 has this size wire). When you get a roller furling you jump up in size to fit a 3/8 wire vs a 5/16. The furling unit prices jump by about 50%. If I went with 5/16 wire (recommended by every rigger I asked) I would save $800 on the furling. |
|
|
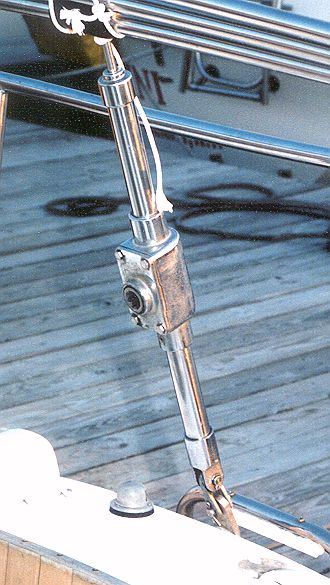
Turnbuckles I switched from the Navtec 500 turnbucles to a standard open body bronze turnbuckle. The navtec's are really nice but they cost about twice as much and you get very little in return. And the standard turnbuckles are easier to adjust. I saved about $400 by using the standard turnbuckles. |

|
|
Backstay Adjuster I added a mechanical backstay adjuster to the rig. I got a great deal on a used Lewmar unit. This unit uses a standard winch handle and came with a nice ratchet handle. Since I was putting the adjuster on the backstay I didn't get a turnbuckle for it. The backstay adjuster does two things. It tensions the backstay which pulls back on the masthead and tightens the headstay taking out sag. This flattens the headsail. On the 10M the backstay tension also controls mast bend (add tension to increase bend). Bending the mast flattens the mainsail. Flattening the sails lets you carry them in slightly higer winds. It seems contrary that straightening the headstay flattens the headsail while bending the mast flattens the main. It is because of the way the sails are cut, specifically the way the luff is cut. However it works it is a handy trim control to have. I have my mast set with about 8-1/2" of rake including a little pre-bend. If I hang a weight off the main halyard it sits 8-1/2" adt of the back side of the mast. The boat seems to me to balance well on all points of sail with easially controlled weather helm. Sail condition will likely affect the proper rake settings for individual boats. |
|
|
Mast Fittings I removed all of the mast fittings to clean them up and re-bed them. Not really re-bed them so much as bed them. They were not properly bedded in the first place and there was a buch of surface corrrosion of the fasteners and under the fittings. Many of the fittings are cast aluminum (spreader bases, winch pads) and I cleaned these up and painted them with a two part polyurethane (car paint). I also painted the spreaders. When I re-mounted all the fittings I chased the threads with a tap and bedded the fasteners in Tef-Gel. This is a paste that insulated the stainless fasteners from the aluminum mast reducing the potential for galvanic corrosion. This process take a long time but it's worth the effort. It's also one of the reasons professional riggers cost so much. To mount a new fitting requres drilling a hole, tapping it, test fitting the part, removing the part, applying the bedding, and installing the part. It's a lot faster if you just use sheet metal screws with no bedding. You could also use rivets and there is some merit in that for certain fittings. |
|
|
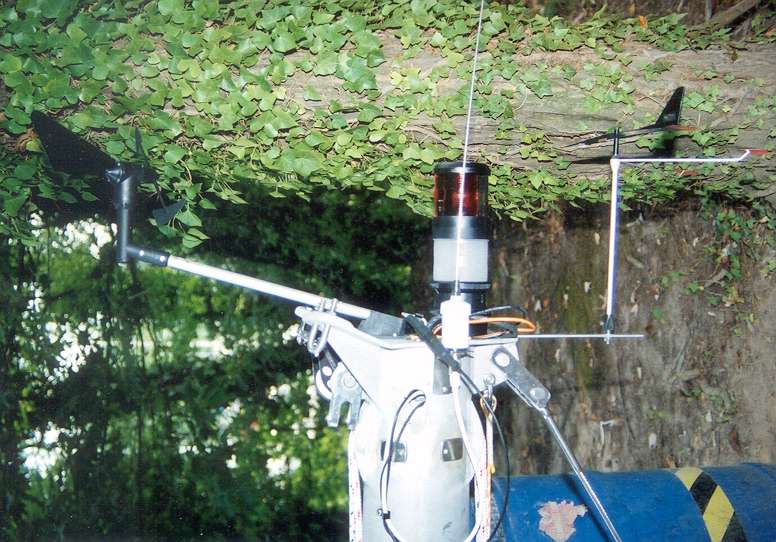
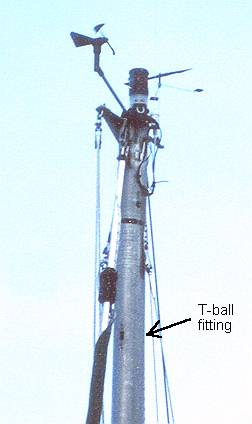
Masthead The masthead seems a bit crowded with the wind transducer, windex and the giant AquaSignal tri-color/anchor/strobe unit. |
|
|
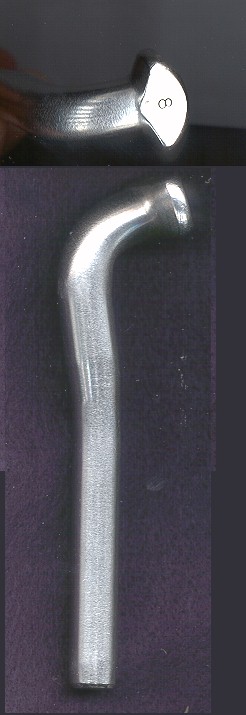
Inner Forestay I intend to add a removable inner forestay to my rig. I decided to add the hardware up on the mast while I had it down. I used a T fitting on the mast. This relatively modern fitting that had a T at the end of the swage fitting that goes into a slot and turns 90 degrees to hold in place. The fitting can articulate side to side and requres very little cutting on the mast. There is a plate that goes inside and is rivited in place. The oval slot that is cut in the mast is just big enough to slide the fitting in. A little fancy string work is all that's needed to get it in place and rivited. I mounted the fitting about 3 feet below the masthead. This is close enough that I can use a jib halyard to raise the sail and I don't need running backs. This is a lot like what's called a "Solent Stay" but I think they actually go all the way to the masthead. On deck I will mount a padeye to attach the stay and a tie rod below deck to transfer the loads to the hull. Click here for another idea... |
|
|
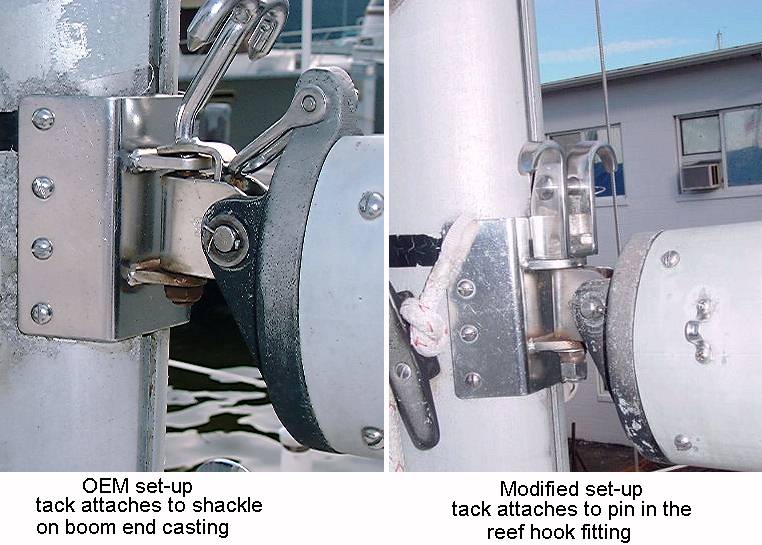
Mainsail Tack Fitting When I was hoisting the stove from the boat with the boom I accidently raised the boom too high and broke the ear of the casting that held the mainsail tack shackle. I needed a fitting for the tack of the mainsail. A new boom end casting was an option but my sailmaker suggested getting the clew closer to the mast if I could. I installed a reef hook/tack fitting from Schaefer (#54-22) on the gooseneck right behind the mast. My sailmaker built the new sail to fit this tack location. The Schaefer part is available from Rig-Rite. |
|