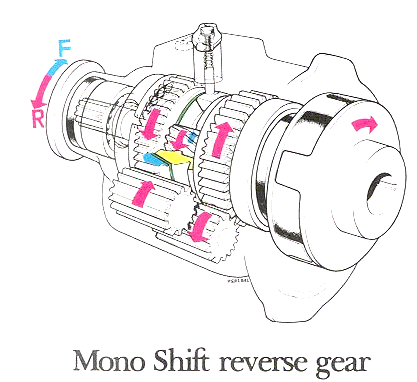
Notes on Volvo MSB reverse gear
Info from Dick Vosbury, January 2004
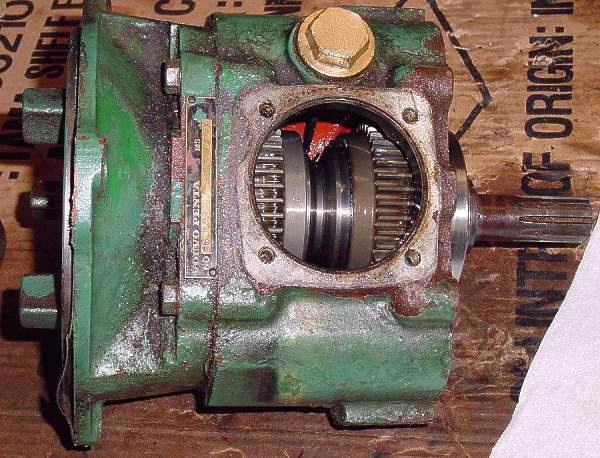
Bearing Fit
On the MSB reverse gear the fit of the output bearing (part #27) of the MSB to the v-drive adapter should have a max gap of .004 to .008". That's including
the gaskets. You need to measure the depth of the recess on the adapter and the thickness of the bearing above the output face of the MSB. IF the depth of the recess is more than .008" greater than the height of the bearing you need a shim. For example, if it's .012 you need a .004 to .008 shim. Include the gasket when you measure the depth of the recess.
Seal
The MSB is sealed and when it gets hot (running) it builds pressure. That can blow the oil past the lip seal at the input of the v-drive if
it's bad and into the v-drive. I have heard of this before. To replace the seal you should remove the angle housing of the v-drive to drive it out from behind. Do not try to pry it out from the front because if you scratch the seal-surface of the input yoke it won't seal.
Repalcement seal for v-drive input:
National Federal - Mogul Oil Seals 471765 1.187 x 2.000 x 0.250
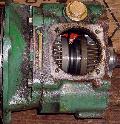
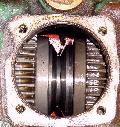
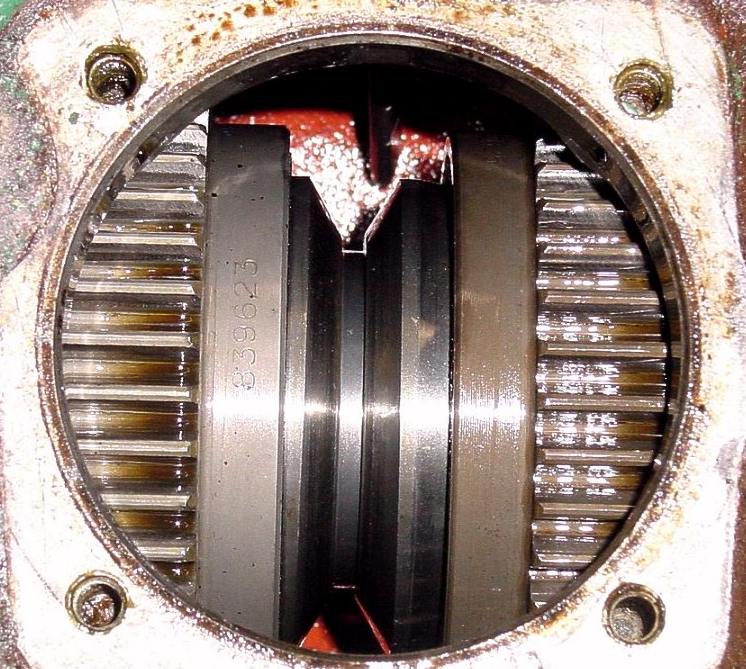
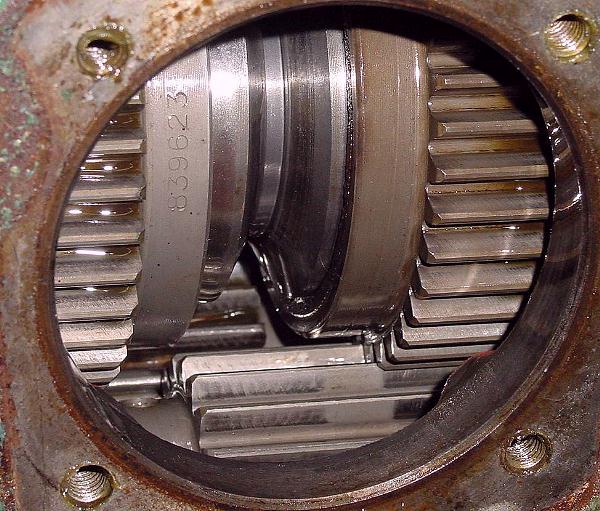
Linings
There are parts that wear in the MSB. There is a lining on the inside faces of the gears. This is where the sliding sleeve (part #24) engages and it is the same stuff as a brake lining. Dick Vosbury said this can be re-lined. A good brake shop might be able to do it. He knew of a place in Baltimore that could do it (jan. 2004). He also said re-built MSB's go for 2,000.
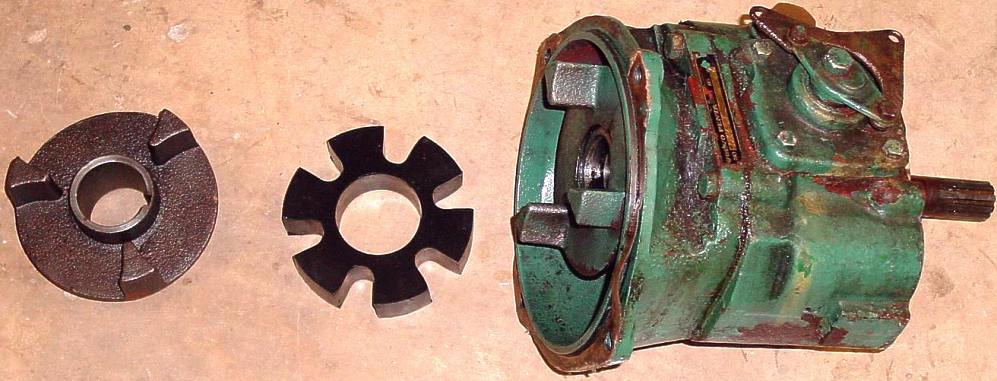
Commonality
The same MSB unit is used on the MD7, MD11 and MD17 (and perhaps others). The MD7 has a different housing between the engine and the MSB. To swap units between these motors that housing also must be swapped. To remove the housing you need to pull the three forked carrier coupler in the input side of the MSB. This is a press fit and requres a puller. Installation probably requires an arbor press?
|
|
MSB notes from Roberto Cordero (10M #233)
For purposes of documentation, let me tell you what I had to deal with. I got everything installed and except for oil, everything is ready to run. The following description was done in a machine shop until the point of assembly to the engine.
As you know the MSB unit is the same for the MD7 as well as the MD11C. The MD7 has a different housing that holds the MSB and is smaller then the MD11C version. The "carrier" on the MD7 MSB Housing sits in the middle of the housing while it is offset to the top in the larger MD11C housing.
First thing we did was remove the Carrier (#2 3 pronged part connecting to engine). This was done easily by using a press. It is kept from rotating by a key which fits in the recessed area in the gear #20. The key can be tapped out without a problem when the carrier is removed. Now looking at the MSB drawing, it seemed like an easy matter to unscrew the housing and exchange between the two units. We banged on the old tranny, used a press and opened up a 1mm gap between the two parts. It won't open further. Fortunately, we did not use a lot of force. If we did, I would have ended up with a major disaster.
Upon more careful examination (by opening up the shift lever compartment), we saw that the bearings, spacers, etc. were being held to the back of the recessed area in the housing with a circlip. If we had forced this, we would have broken a lot of stuff. So there had to be something else holding this housing to the bearings and gears. We saw an oil seal (I believe it was 68mm OD, 50 mm ID -- I didn't record the thickness). We banged on the seal until it broke and then pulled it out.
This revealed a circlip, then there are 2 shims under it. On the old unit, we forced the circlip out with with too much force and destroyed the shims. You've got to be careful here. Once the circlip and shims are removed, we pressed down against the bearings and the housing separated from the MSB (finally!). We were able to repeat this process on the new MSB without difficulty.
By the way, at this point, once has access to the #20 gear. I was able to pull it up maybe 1/2 inch but it would no further. There is no access to any other circlips. Those all attach to the housing so the only thing you really see is the entire #20 gear and shaft with nothing on it. I have not done this but it seems to me that it would be a minor project at this point to open up the transmission from the back end by somehow removing the plug in the middle of the gear. On my MSB's it seems like a round piece of metal (a coin on one of the MSB's) is covering this hole. It can probably be removed and I expect it will reveal a bolt on the inside. It is my guess that the bolt holds the #20 attached to the rest of the gears or sliding sleeve/cone. I might get a chance to try this out but I will have to do this later.
Anyway, back to assembling the new MSB, as I said earlier, the bearings, shims, circlips, spacers, etc. are actually attached to the housing -- not the #20 gear. So we pressed the replacement housing to the new MSB, and then tried to put the circlip in as a trial (holding on to the shims first). Circlip wouldn't go in. This was a problem because the #20 shaft has to go further into the bearing but won't. So we had to open up the shifting box and pull it out to get access. Then we tapped the gear #20, from the inside, to force it go further into the housing so that the circlip groove will stick out above the bearing. This was successful. We guessed that it need to go further in by 60 thousandths. It worked. It made me nervous to be banging on a gear but that was the only way.
As another aside here, the gasket was not broken on the housing so we reused it but added permatex to it.
We knew we did this assembly right because we were able to fit the two shims and the circlip like the original. At first, it was suggested that we don't use the shims. I said that was a no-no since it will impact the distances between parts inside. Anyway, we bent the shims a little bit and hammered it back into shape. We put it back in with the circlip sucessfully.
Now we looked for the availability of a seal to replace the one we broke. We found one that was not exactly the same but the only difference was that the rubber extended out on top. We felt this was not an issue so we went on with it. The seal was very hard to pop in so we used an old bearing to push it in (this seal is much larger than the one on the V drive). It was a tight fit but it went in.
The final task was to put the lock pin and carrier back on. We used a press to squeeze the carrier back in and no problem was encountered.
When I installed the MSB/V drive to the engine, this time I installed them as two separate parts which was a lot easier. It was easy to align the MSB with new housing to the opening of the MD11C. A few short turns lined up the carrier to the rubber flange of the crankshaft. I made my own gasket. It was thicker than the original. The gasket material was 1/32 and was the thinnest I could find. We'll see if this works.
I made a gasket by cutting holes for the carrier parts that stick out and then laid the gasket material next to the housing. Then using a ball peen hammer, I made out the shape of the inside opening. I cut it with scissors. Then I put the gasket back in, traced the outside with a pencil and cut the excess with scissors.
When putting in the screws for the engine, the screws came with lock washers. I tightened them with an allen wrench. It was hard to reach the top bolt with anything but a small allen wrench. On the other ones, I was able to use a torque wrench and tightened to 50lbs. I used an adjustable wrench to leverage the allen wrench and tightened that as far as it can go.
Now it was time to put in the V drive. I positioned the V drive gasket that I got from Vosbury and the old shim, and then pressed it in. The V drive is held in place by the bearing so it was easy to line up and realign the gasket as needed. I screwed in the propshaft coupling bolts and that was the end of that.
I still have to figure out a way to put oil in the V drive but besides that, everything is done.
I hope this helps if anyone else tries to do this. If taken a little further, it seems to me that someone could rebuild the transmission by replacing some gears. Once #20 is exposed, there's not that many parts left between the two big gears.
roberto