
|
| Sea Water Washdown |
Cutting the Hole
|
The first step was to cut a hole for the deck fitting. I had a hole saw about 1/8" under the size needed. I used that and trimmed the hole to for a tight fit with my Dremel tool with a coarse sanding drum. I then chucked a 1/8" allen key with in cordless drill. I had cut off the short end to a chisel shape using a cutting wheel in the dremel. I used this tool to remove the balsa around the hole back about 1". You have to take care here because a lot of torque can twist the allen key. I usually start with a short one and work my way up. The key sweeps around chewing out the Balsa. I taped a plastic bag on the underside to catch the bits.
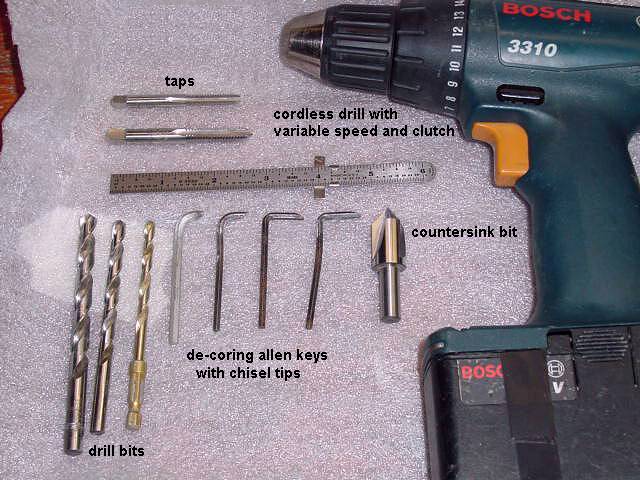
De-coring tools |
 |
Filling the Void
I filled the void with West System epoxy thickened with 406 filler to a peanut butter consistency. I first brushed in straight epoxy (no filler) on the surfaces inside the void to get better adhesion. Then I troweled in the filler/epoxy with a tongue depressor. I got the face reasonably smooth but this is not a big deal because there is some sanding/trimming to come. After the epoxy set I trimmed the hole back with the Dremel/sander to get a snug fit for the fitting.
Mounting Screws and Sealant
| Using the deck fitting as a template I drilled four holes 5/32 for the mounting screws. I drilled through the outer skin and the epoxy filler but not through the inner skin. I tapped the holes for 10-24 machine screws with a bottom tap (a tap that cuts threads to the bottom of a hole) and cut four fasteners to the right length with the bolt cutters in my wire crimping tool (they are easy to cut). Using my Dremel/sander I cut a chamfer in the top edge of the big hole as a reservoir for sealant. I cut similar chamfers on the screw holes with a counter sink bit (seen in the photo). I applied a 1/4" bead of Life Caulk (polysulfide) around the inner edge of the deck fitting base and a drop to each screw hole and fastened the fitting down. I fully tightened it right away. Typically with sealant jobs you just snug and wait for the sealant to set then tighten down. But when sealing with threaded holes as I did that would tear the sealant so I tighten fully from the start. |
 |
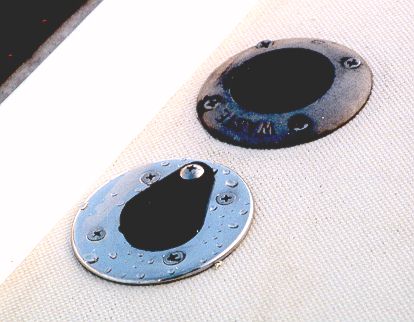
Finished Mounting
| This photo shows the finished mount of the deck fitting. The deck fitting has a larger diameter part at the bottom that I put on after the unit was in place so I could have a smaller hole in the deck. |
 |
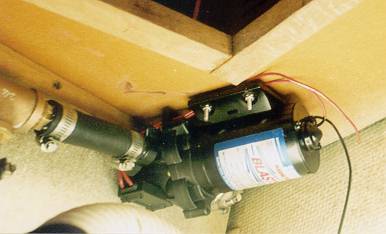
Pump Mounting
| This photo shows the washdown pump mounted on the underside of the v-berth deck on the port side. Four #10 flathead screws are countersunk into the v-berth deck and the pump is fastened with nylock nuts. The output hose runs through the bulkhead and into the hamper space then up to the deck fitting. |
 |
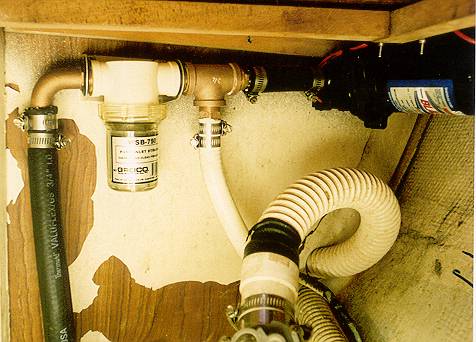
Pump Strainer
| The washdown pump water input taps off the same seacock as the head intake. The tap is just after the intake strainer (a very important part of the system) which is mounted inside the locker under the port side v-berth. |
 |
Next Steps in Project
I need to wire up the pump with 12v power and I am ready to go.