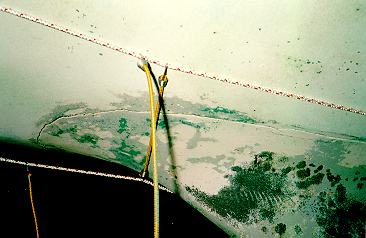
This photo shows the keel-hull seam. The seam is filled in with a filler (probably bondo from the factory) and needs occasional attention. The keel flexes a bit and this works the filler lose and a crack forms. This is normal. I filled and faired it with West System epoxy with a fairing additive. This has held up well for 4 seasons.
On SailNET Don Casey wrote an article about keel hull joints where he described signs of serious problems. They used the photo on this page as an exaple with this caption:
"Cracks between hull and keel are obvious
signs of movement and indicate trouble."
However, this is NOT an example of a serious problem on the P26. Sailnet asked me a while ago of they could ocasionally use some of my photos as illutrations for their artices. I thought this was fine but they probably should have done some more research on this one before using it as they did. Despite what the caption they used in the article says, this crack is not a sign of trouble.
Don Casey's Article on SailNET
Details on keel and keel bolts