


Trim molding from Catalina Direct Parts

Glazing Channel from Catalina Direct


| Pearson Fixed Port Anatomy |
|
|
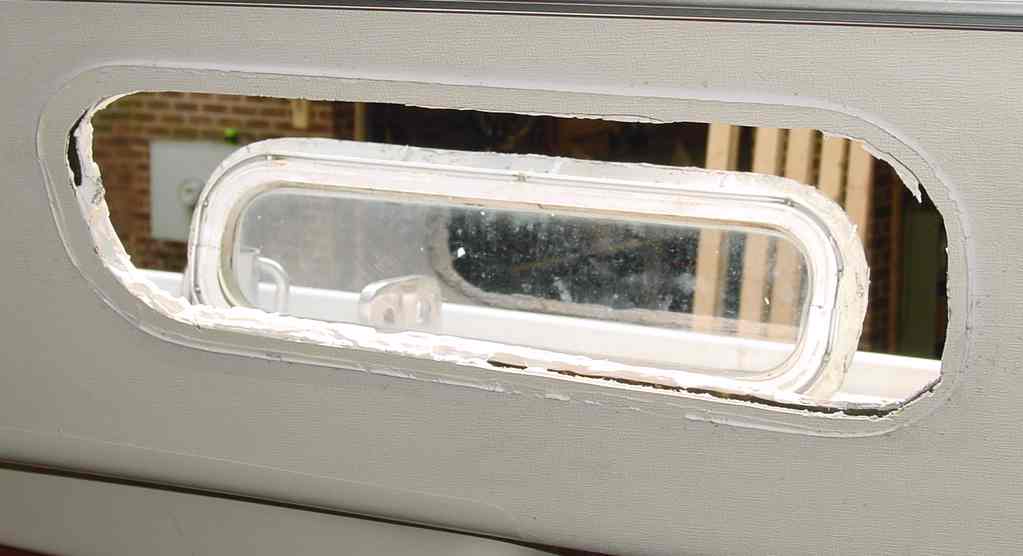
This is the port in the cabin side with the inner frame removed. I think a previous owner added the white silicone. The inner frame is held to the outer with sheet metal screws. |
|
|
Getting the outer frame off the cabin side requires breaking the sealant between the two. I think flexible putty knife is useful and a utility knife. Piano wire has also been suggested and some sort of wire saw. The outer frame is fairly delicate and care must be taken to keep from deforming the flange. |
|
|
The cabin side consists of the outer skin (solid fiberglass about 1/4" thick) and the inner liner (also solid glass about 3/16" thick). There is a gap between the two and the thickness varies. The inner liner is pretty flexible and is probably made form a chopper gun. The outer is a lay-up of woven roving and mat. |
|
|
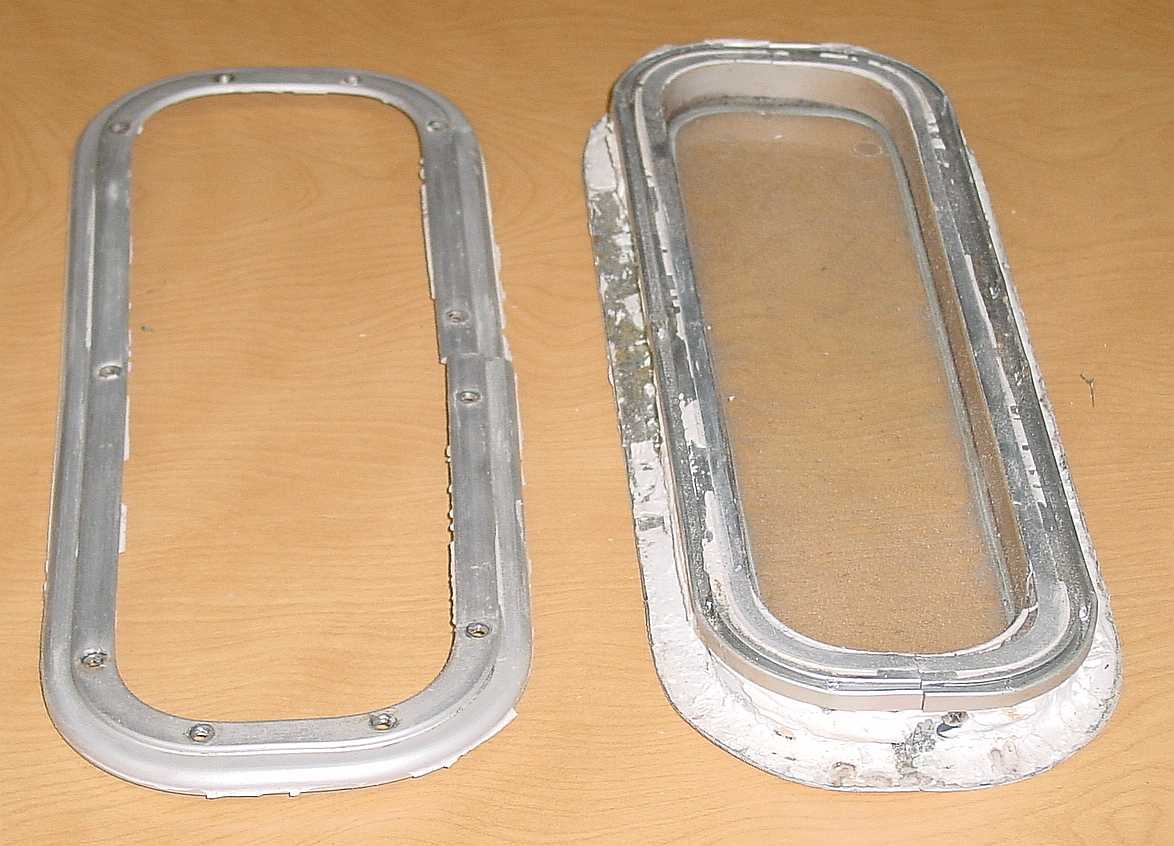
Here are the basic assembly parts, the inner frame and the outer frame with the glass in place. |
|
|
I expect this is the typical state of fixed port frames on a lot of boats. Lots of added silicone. |
|
|
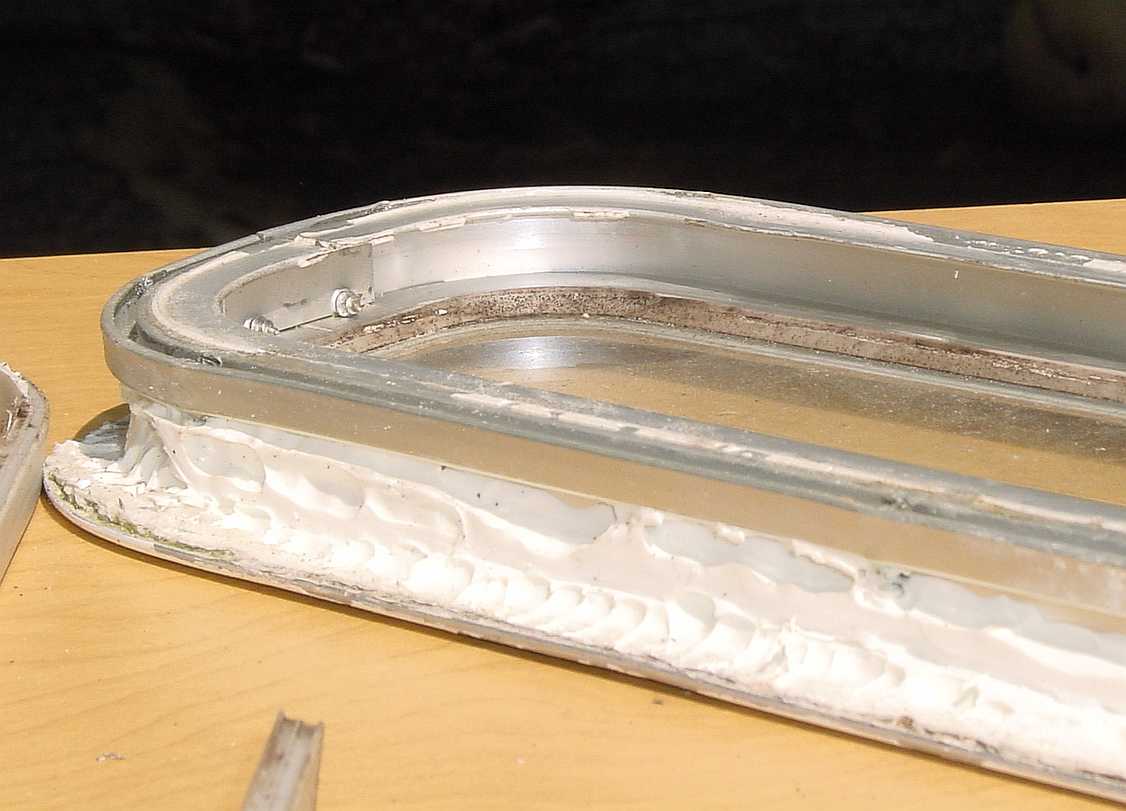
The backside of the inner frame and the outside of the outer frame. Note how the flange of the outer frame is distorted from the removal process. This port will be replaced with an opening port but if this were being re-used I expect getting a good seal would be difficult. |
|
|
This shot shows a detail of the frame and how the inner and outer frames fit together. |
|
|
This photo shows the trim molding on the inner edge of the outer frame. This fills a gap between the glass ands the inner edge of the frame. This is not a structural part, just trim. Replacement for this molding is available form Catalina Direct:
Trim molding from Catalina Direct Parts |
|
|
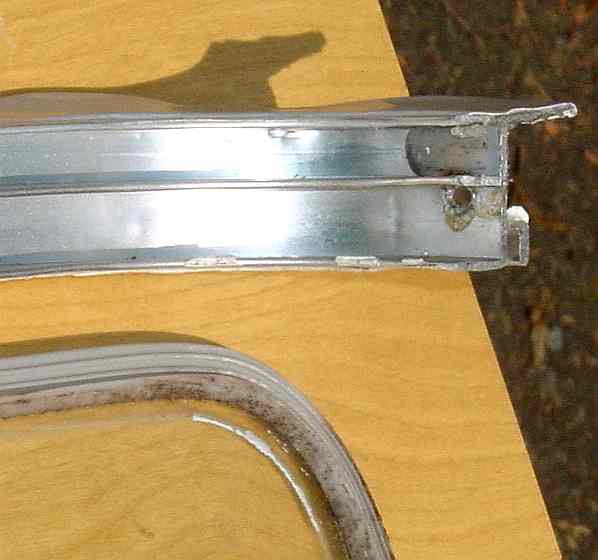
This photo shows the channel that the trim molding fills and the screws that hold the two part outer frame together. |
|
|
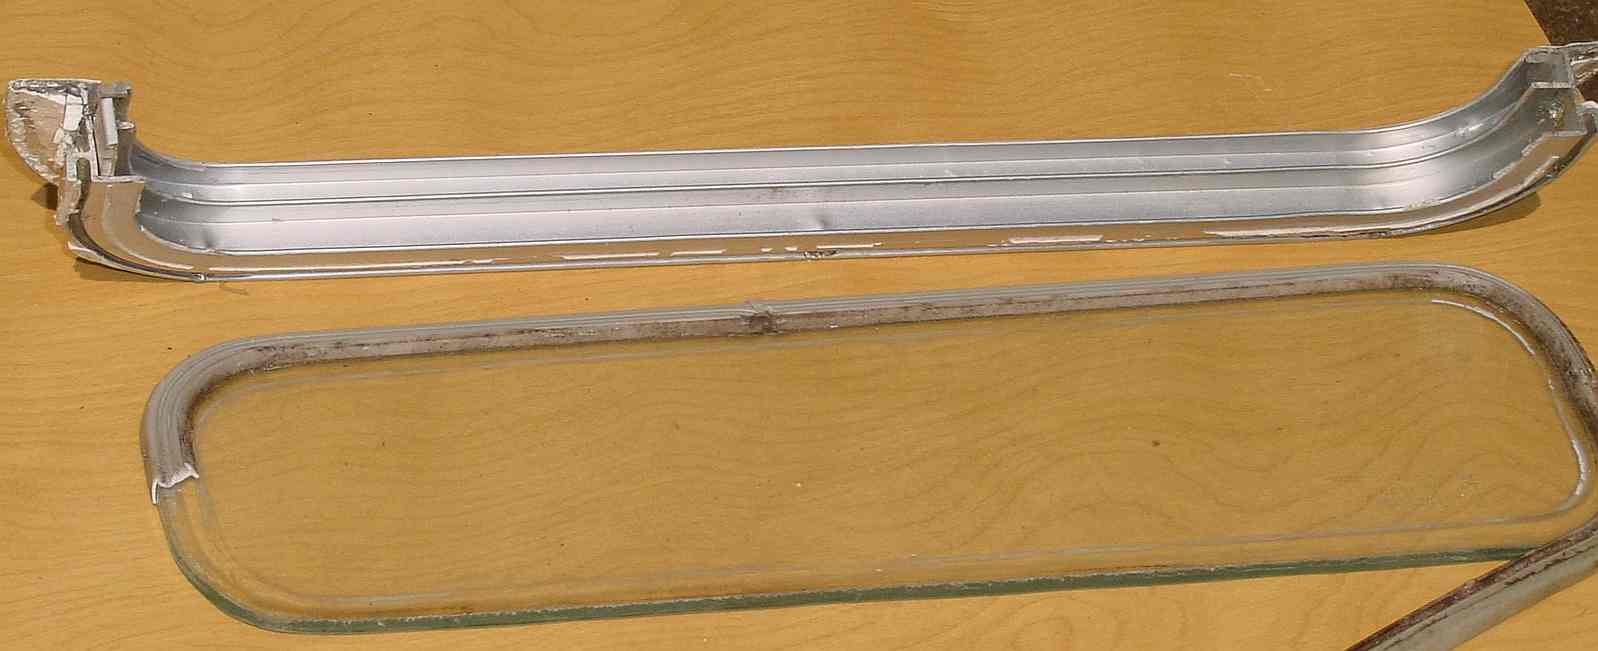
In this photo the 2 piece outer frame has been split apart. This came apart pretty easily. Getting the glass out of the second half of the frame will be more difficult. The trim glazing is also shown out of the frame. There is a Vinyl Glazing Channel that fits around the edge of the glass. It holds the glass into a channel in the aluminum extrusion. Glazing Channel from Catalina Direct |
|
|
This photo shows how the outer frame halves fit together. You can see the Vinyl Glazing Channel. |
|
|
This photo shows the glass with the glazing pulled off. Note the somewhat rough edge of the glass. |
|
|
This photo shows the Vinyl Glazing Channel in the extrusion and the factory silicone sealant (clear) added to the channel during OEM assembly. The ridge on the outer face of the glass is a bead of silicone (maybe added by an owner to try and stop a window leak, or maybe factory?). |
|
|
The glass pulled out of the 2nd half of the frame without too much trouble. The only part in the groove for the vinyl glazing that had silicone was the section at the seam between the halves. |
|
|
The groove the glass is set in is pretty clean. |
|
|
This photo shows the extent of silicone sealant in the extrusion groove for the glass. |
|
|
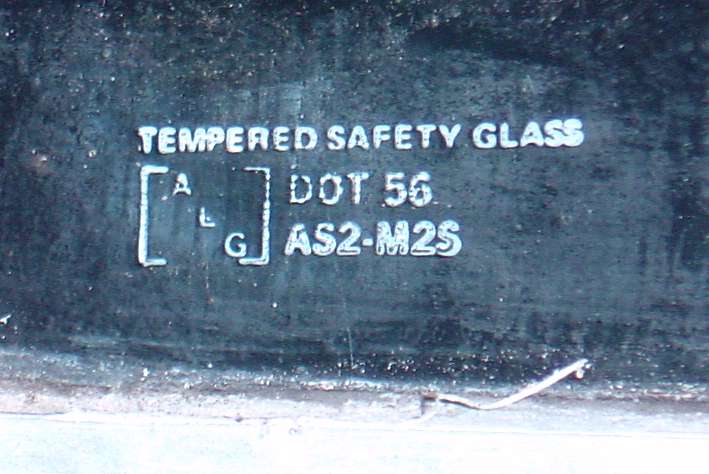
This is the label on the OEM glass. |